
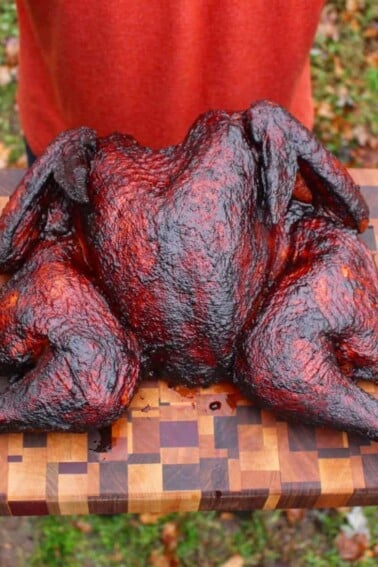
Spatchcock Turkey is here, and it’s just in time for Thanksgiving! This smoked turkey is super easy to cook and will leave you with a full and happy belly after dinner. I seasoned this turkey up with my Maple Bourbon seasoning (and while I might be bias) I do think this is one of the best turkeys I’ve ever had. Cheers to you and yours over the holiday!
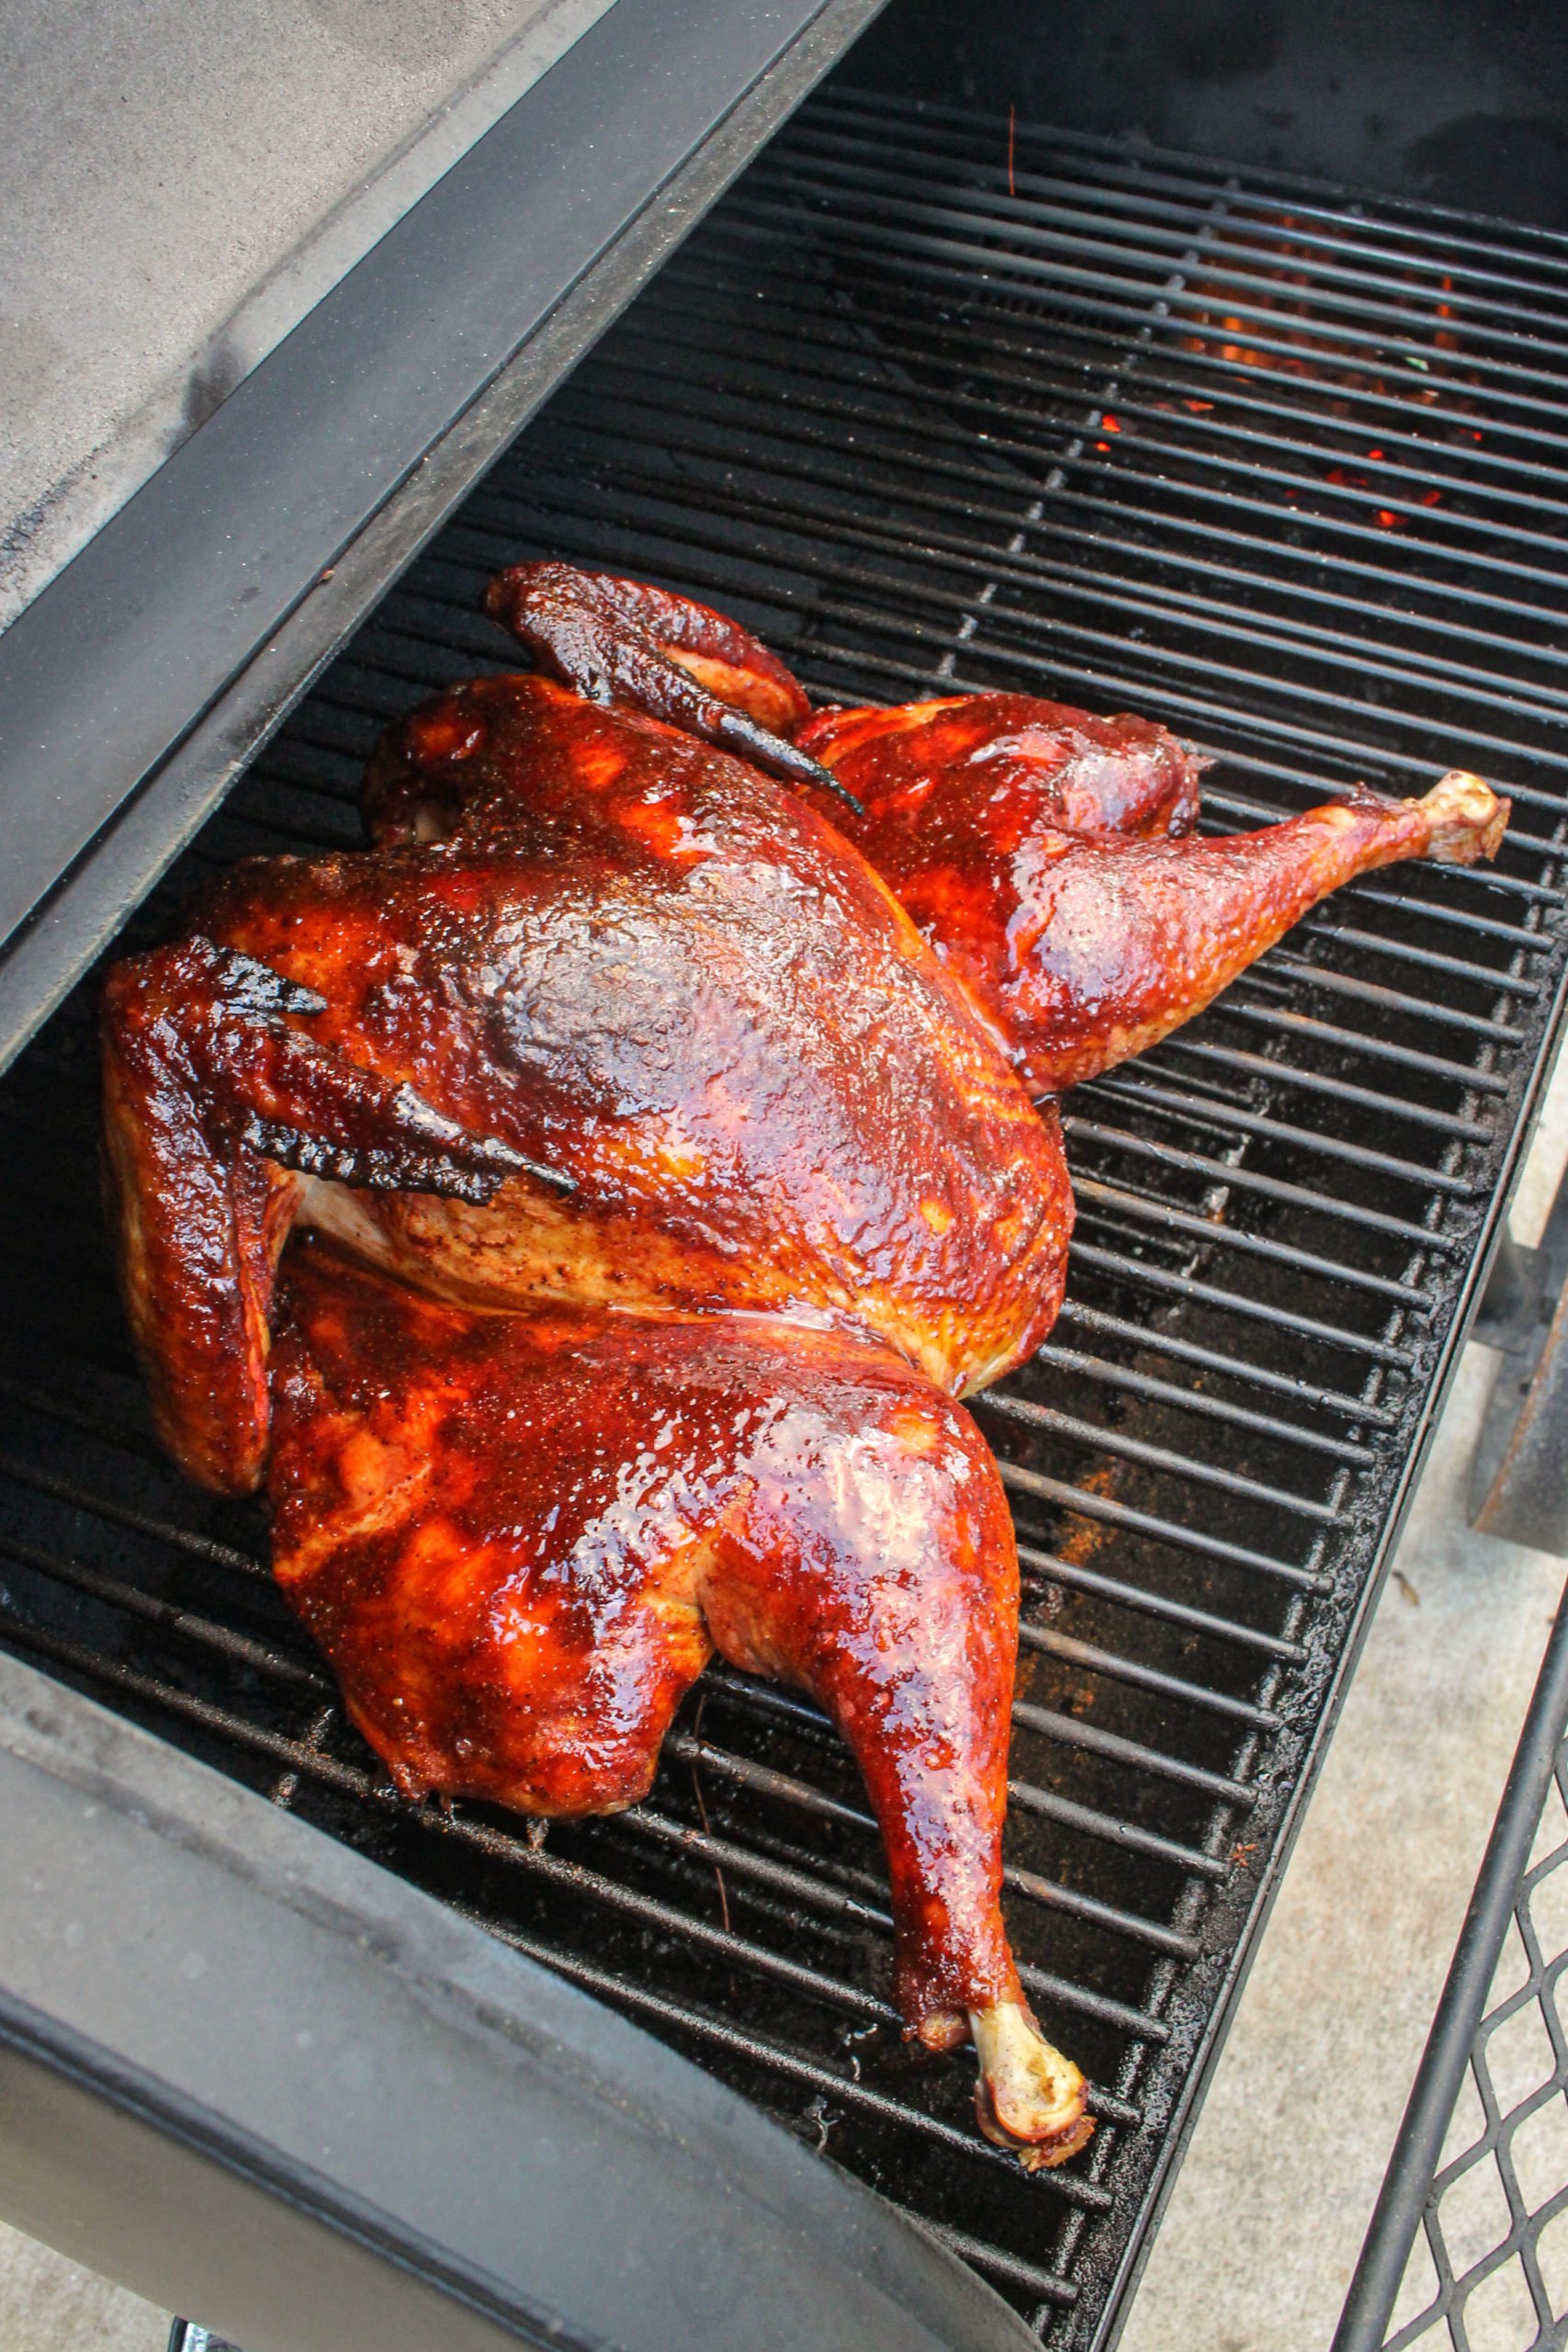
Table of Contents
Why you’ll love this recipe
This Spatchcock Turkey recipe is the best way to get super juicy meat perfectly cooked all over! This is because the Spatchcock method increases the surface area of the meat to allow it to cook more evenly.
Smoked vs Baked vs Fried vs Rotisserie Turkey, which is the best? Watch my YouTube video to find out!
You’ll also love how flavorful this delicious turkey is! The Maple Bourbon seasoning and glaze is the perfect blend of citrus and sweet, resulting in a decadent outer coating that melts in your mouth.
If you’ve never made a turkey for Thanksgiving before or need to jazz up your old recipe, you’ll love this Spatchcock Turkey!
Ingredients
TURKEY:
- Whole Turkey – try to find a nice 14 to 16-pound turkey.
- Maple Bourbon Seasoning – This is a seasoning from my spice line! It contains maple sugar, chili pepper, bourbon flavor, and paprika for the ultimate sweet and spicy blend.
- Unsalted Butter – we slice up the butter and stick it underneath the turkey skin, producing a super juicy turkey.
Add flavor to everything you’re cooking
shop over the fire spice lines
BRINE:
- Water – this is the base for the brine.
- Salt – helps tenderize the turkey meat.
- Sugar – adds flavor and helps the skin get super crispy.
- Bay Leaves – enhance the flavor of the brine.
- Cinnamon Sticks – adds a spicy twist and infuses the bird with flavor.
For more info on brining, check out my deep dive on the process with The Benefits of Brining.
MAPLE BOURBON GLAZE:
- Bourbon – adds subtle caramel notes that elevate the flavor of the tender meat.
- Navel Orange – brightens up the glaze and adds a zesty, tangy twist.
- Maple Syrup – sweetens the glaze and pairs wonderfully with the bourbon, creating a luscious, syrupy texture.
- Cinnamon – adds a warm, aromatic note to the glaze, enhancing its depth of flavor.
How to Make Spatchcock Turkey
If you’re using a frozen turkey, make sure it’s completely thawed before brining it.
To start the brining process, fill a 5-gallon food-grade bucket with water 3/4ths the way full. Then, I mix together all the brine ingredients and carefully set the turkey in. Make sure the turkey is fully submerged so we can ensure the whole bird reaps all the brining benefits! Then, place it in the fridge to brine overnight for 8-18 hours.
To learn more about bringing, check out my article: The Benefits of Brining.
For another brining recipe, check out these Garlic Parmesan and Beer Wings.
The following day, remove the turkey from the brine and pat it dry using paper towels. You don’t want too much moisture, or the bird will steam rather than smoke.
Next, grab some cooking shears or a sharp knife to remove the spinal cord from the bird. After it’s removed, flip the bird over and gently (but firmly) press the chest of the bird until it lays flat.
You will hear some bones crack or move out of place. That’s okay because it will need to happen for the bird to lay flat. However, try to do as little damage as possible because it’s easier to carve and disassemble a bird that isn’t full of broken bones. Okay, now let’s talk about flavoring.
Helpful How Tos
If you’d like a visual on how to spatchcock a turkey, check out my video below!
From here, I used one of my favorite turkey tricks: placing slices of butter under the turkey skin. When you have a protein that doesn’t carry a lot of initial flavor, we need to add it. We’ve already brined the turkey to start this process, but now I’m going to add some fat because more fat equals more flavor.
To do this, carefully lift up the skin and disperse thin slices of butter throughout the turkey. Try not to rip the skin during this process. I said be careful for a reason.
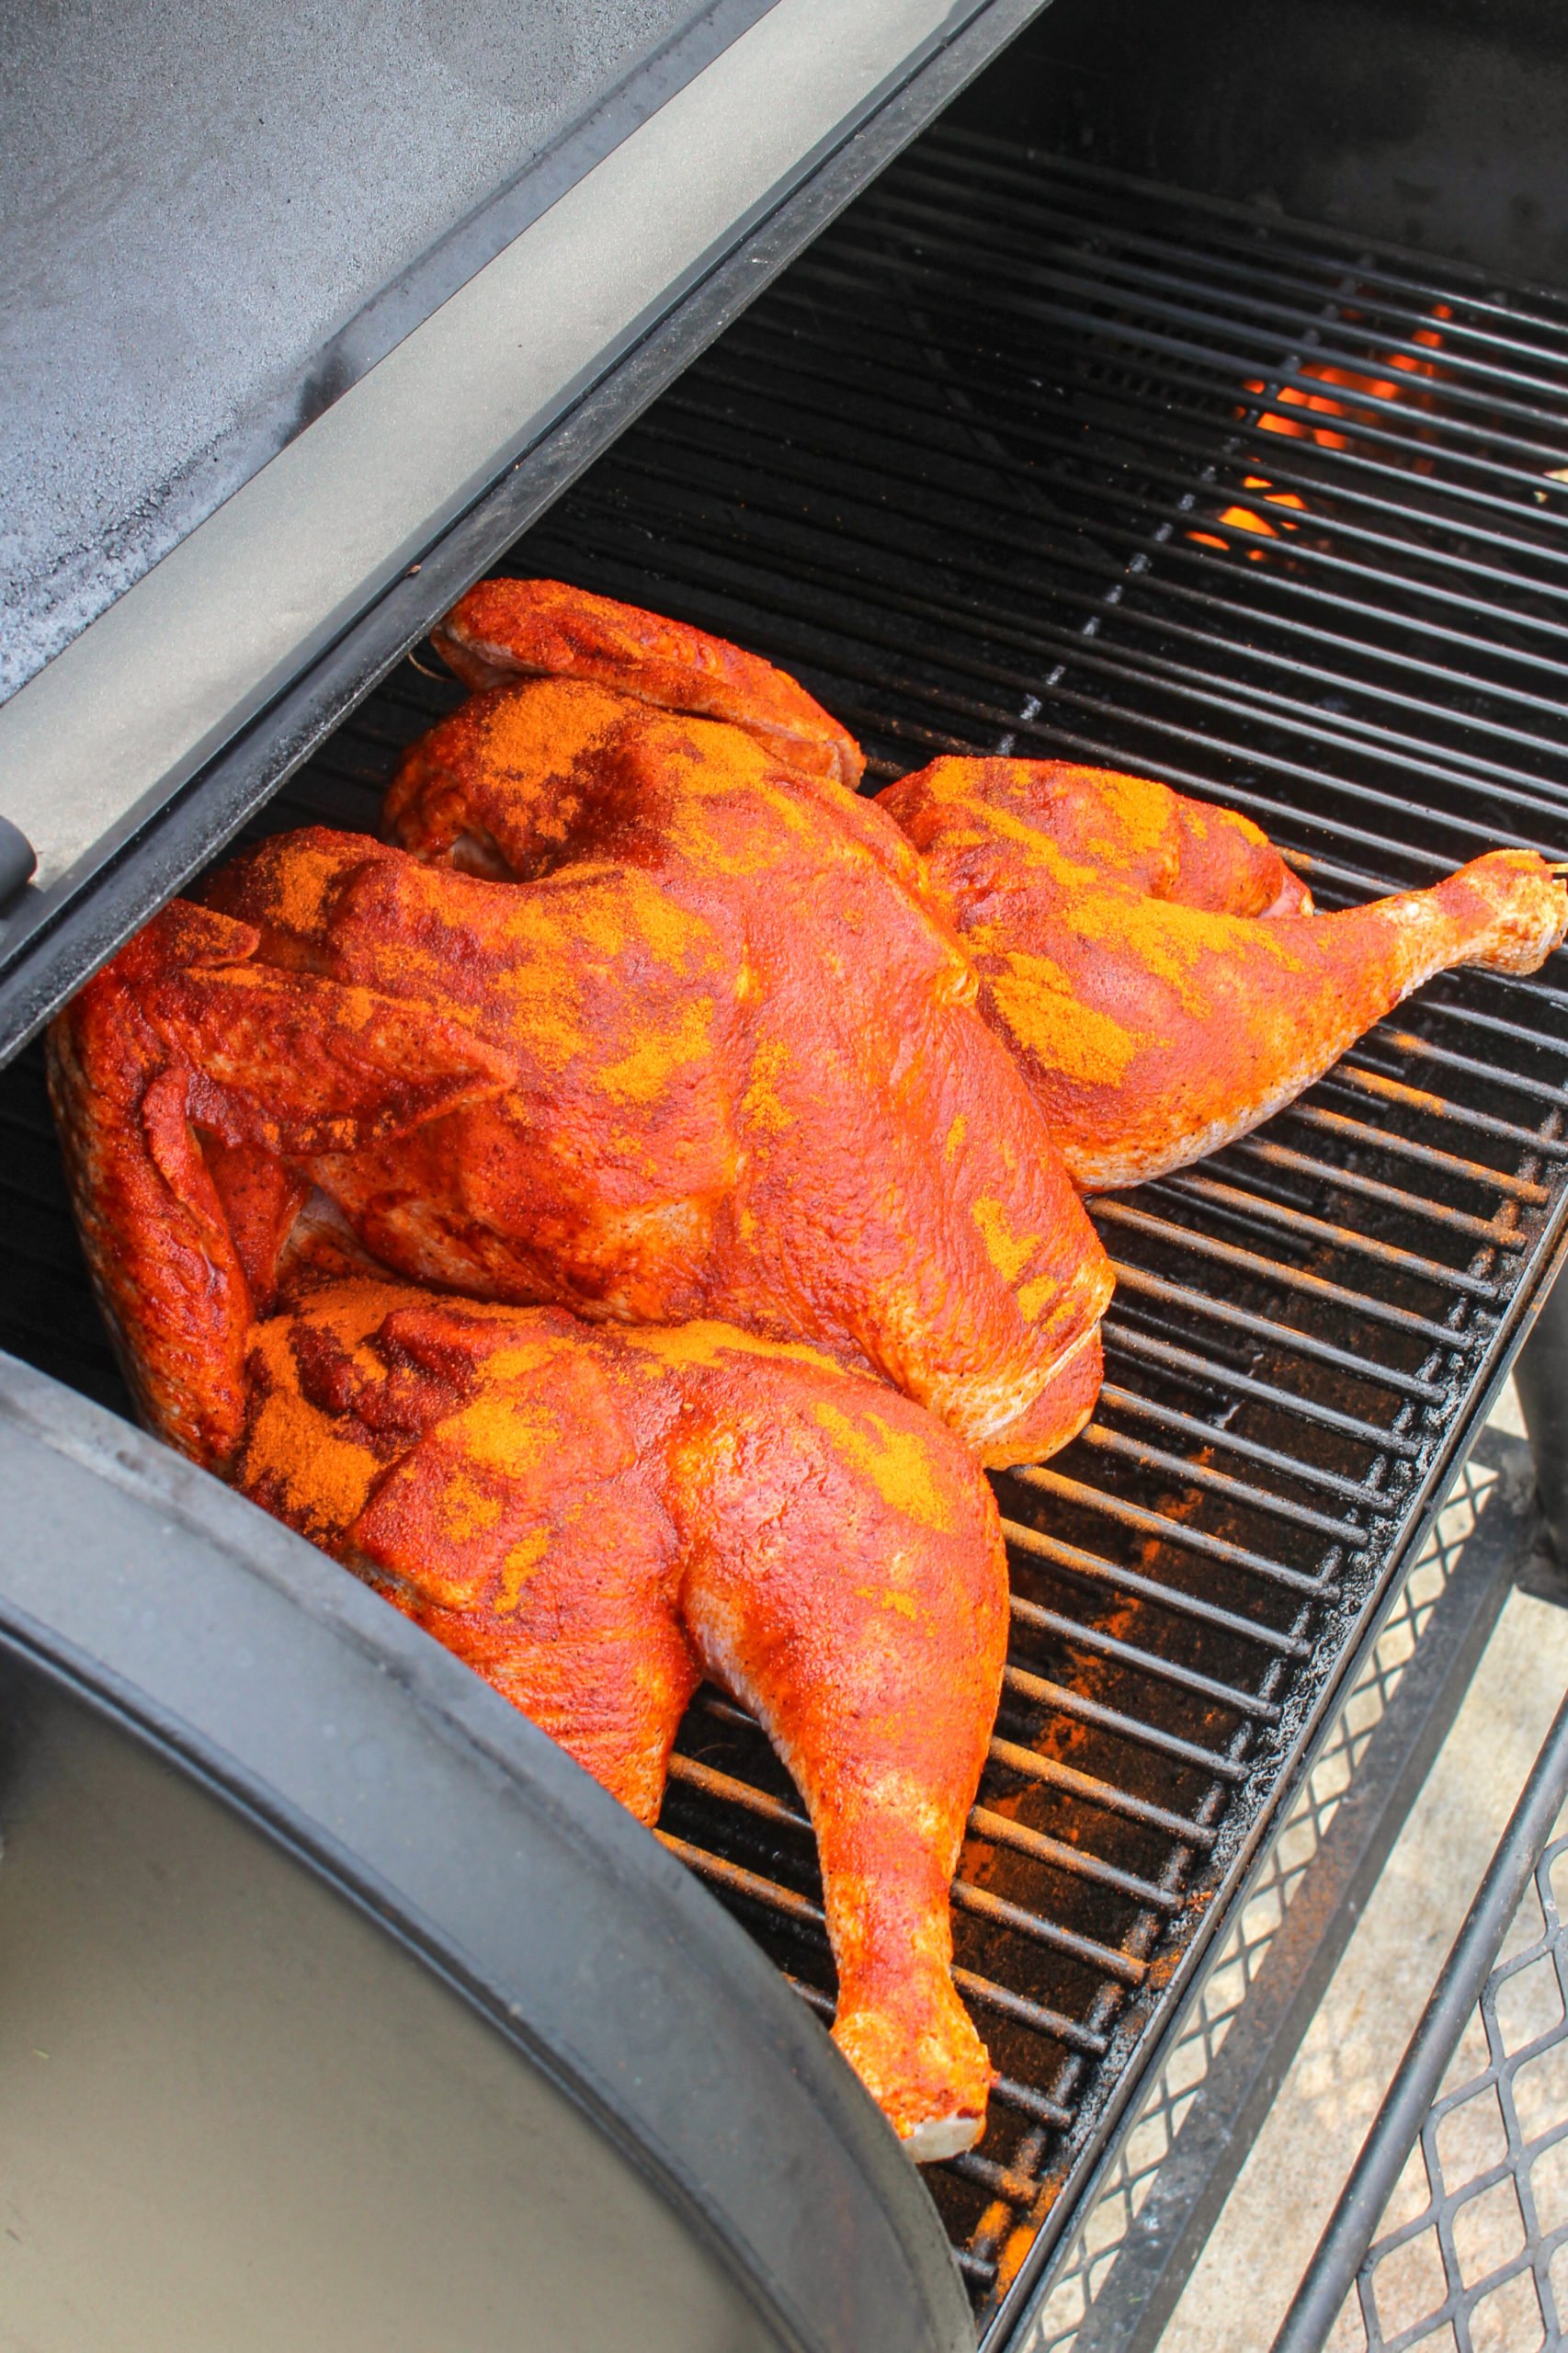
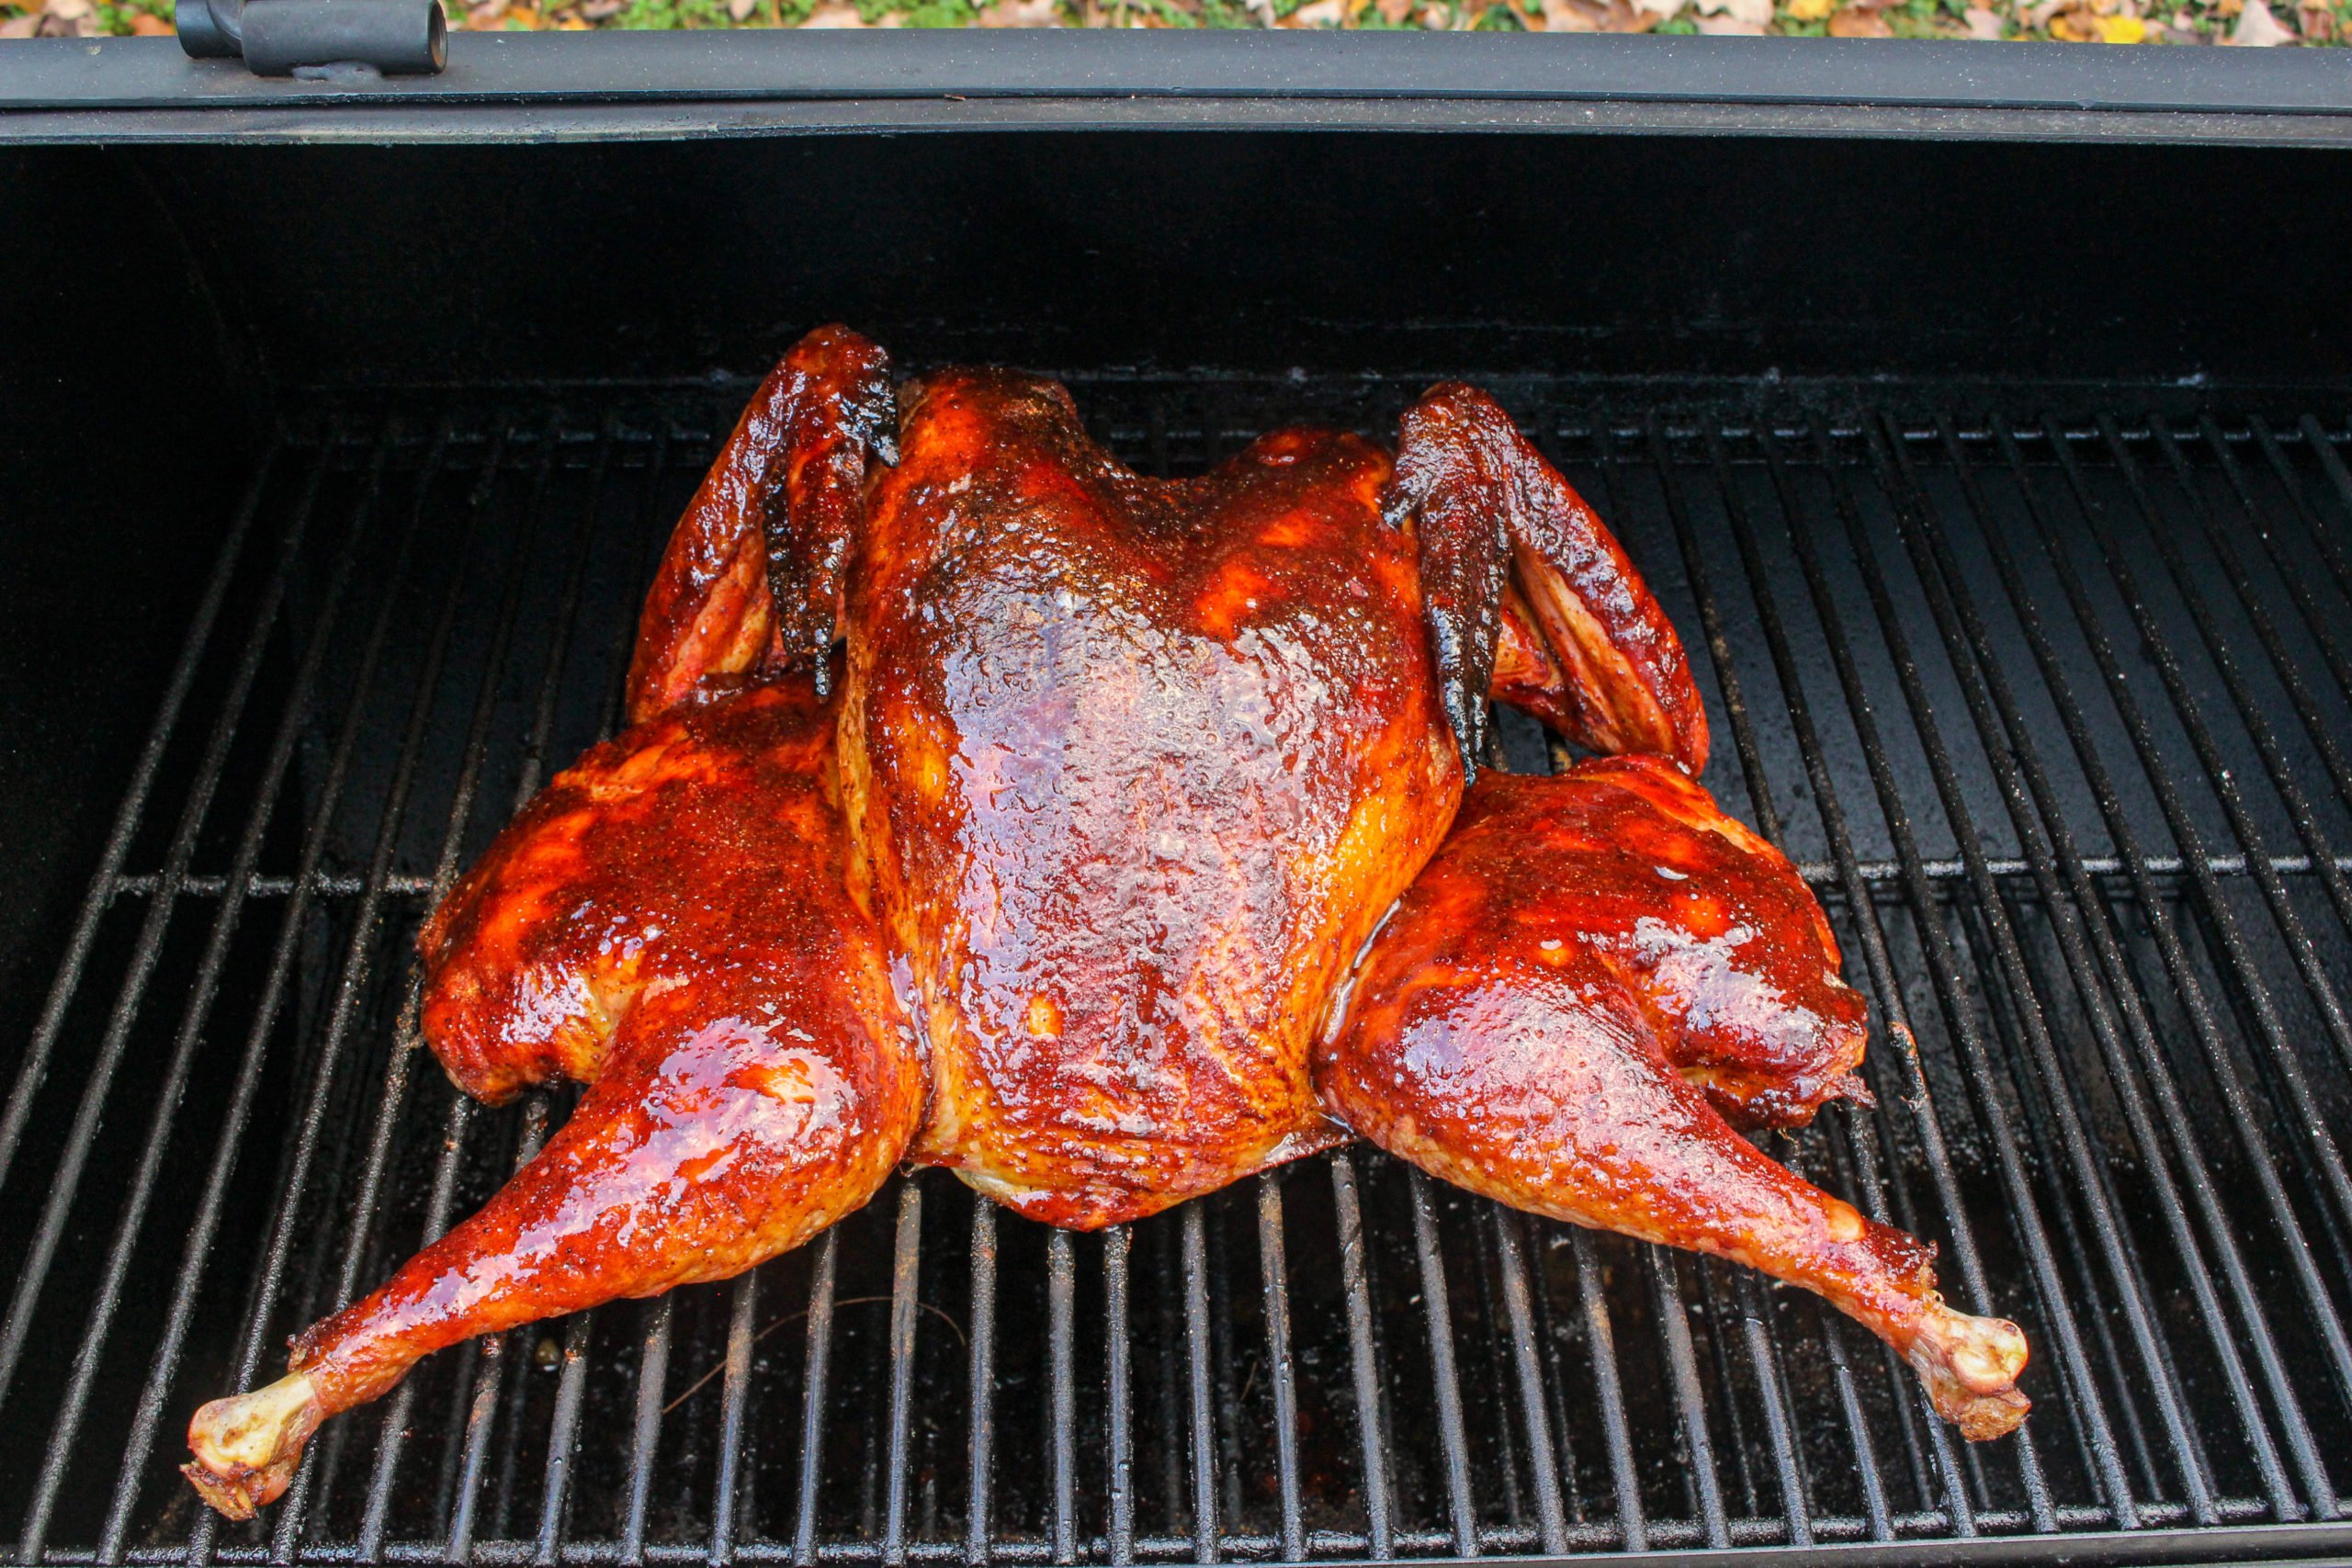
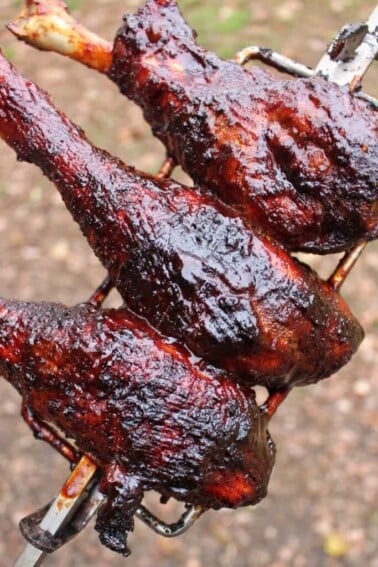
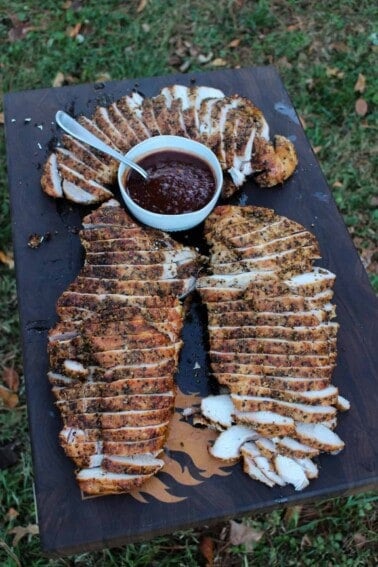
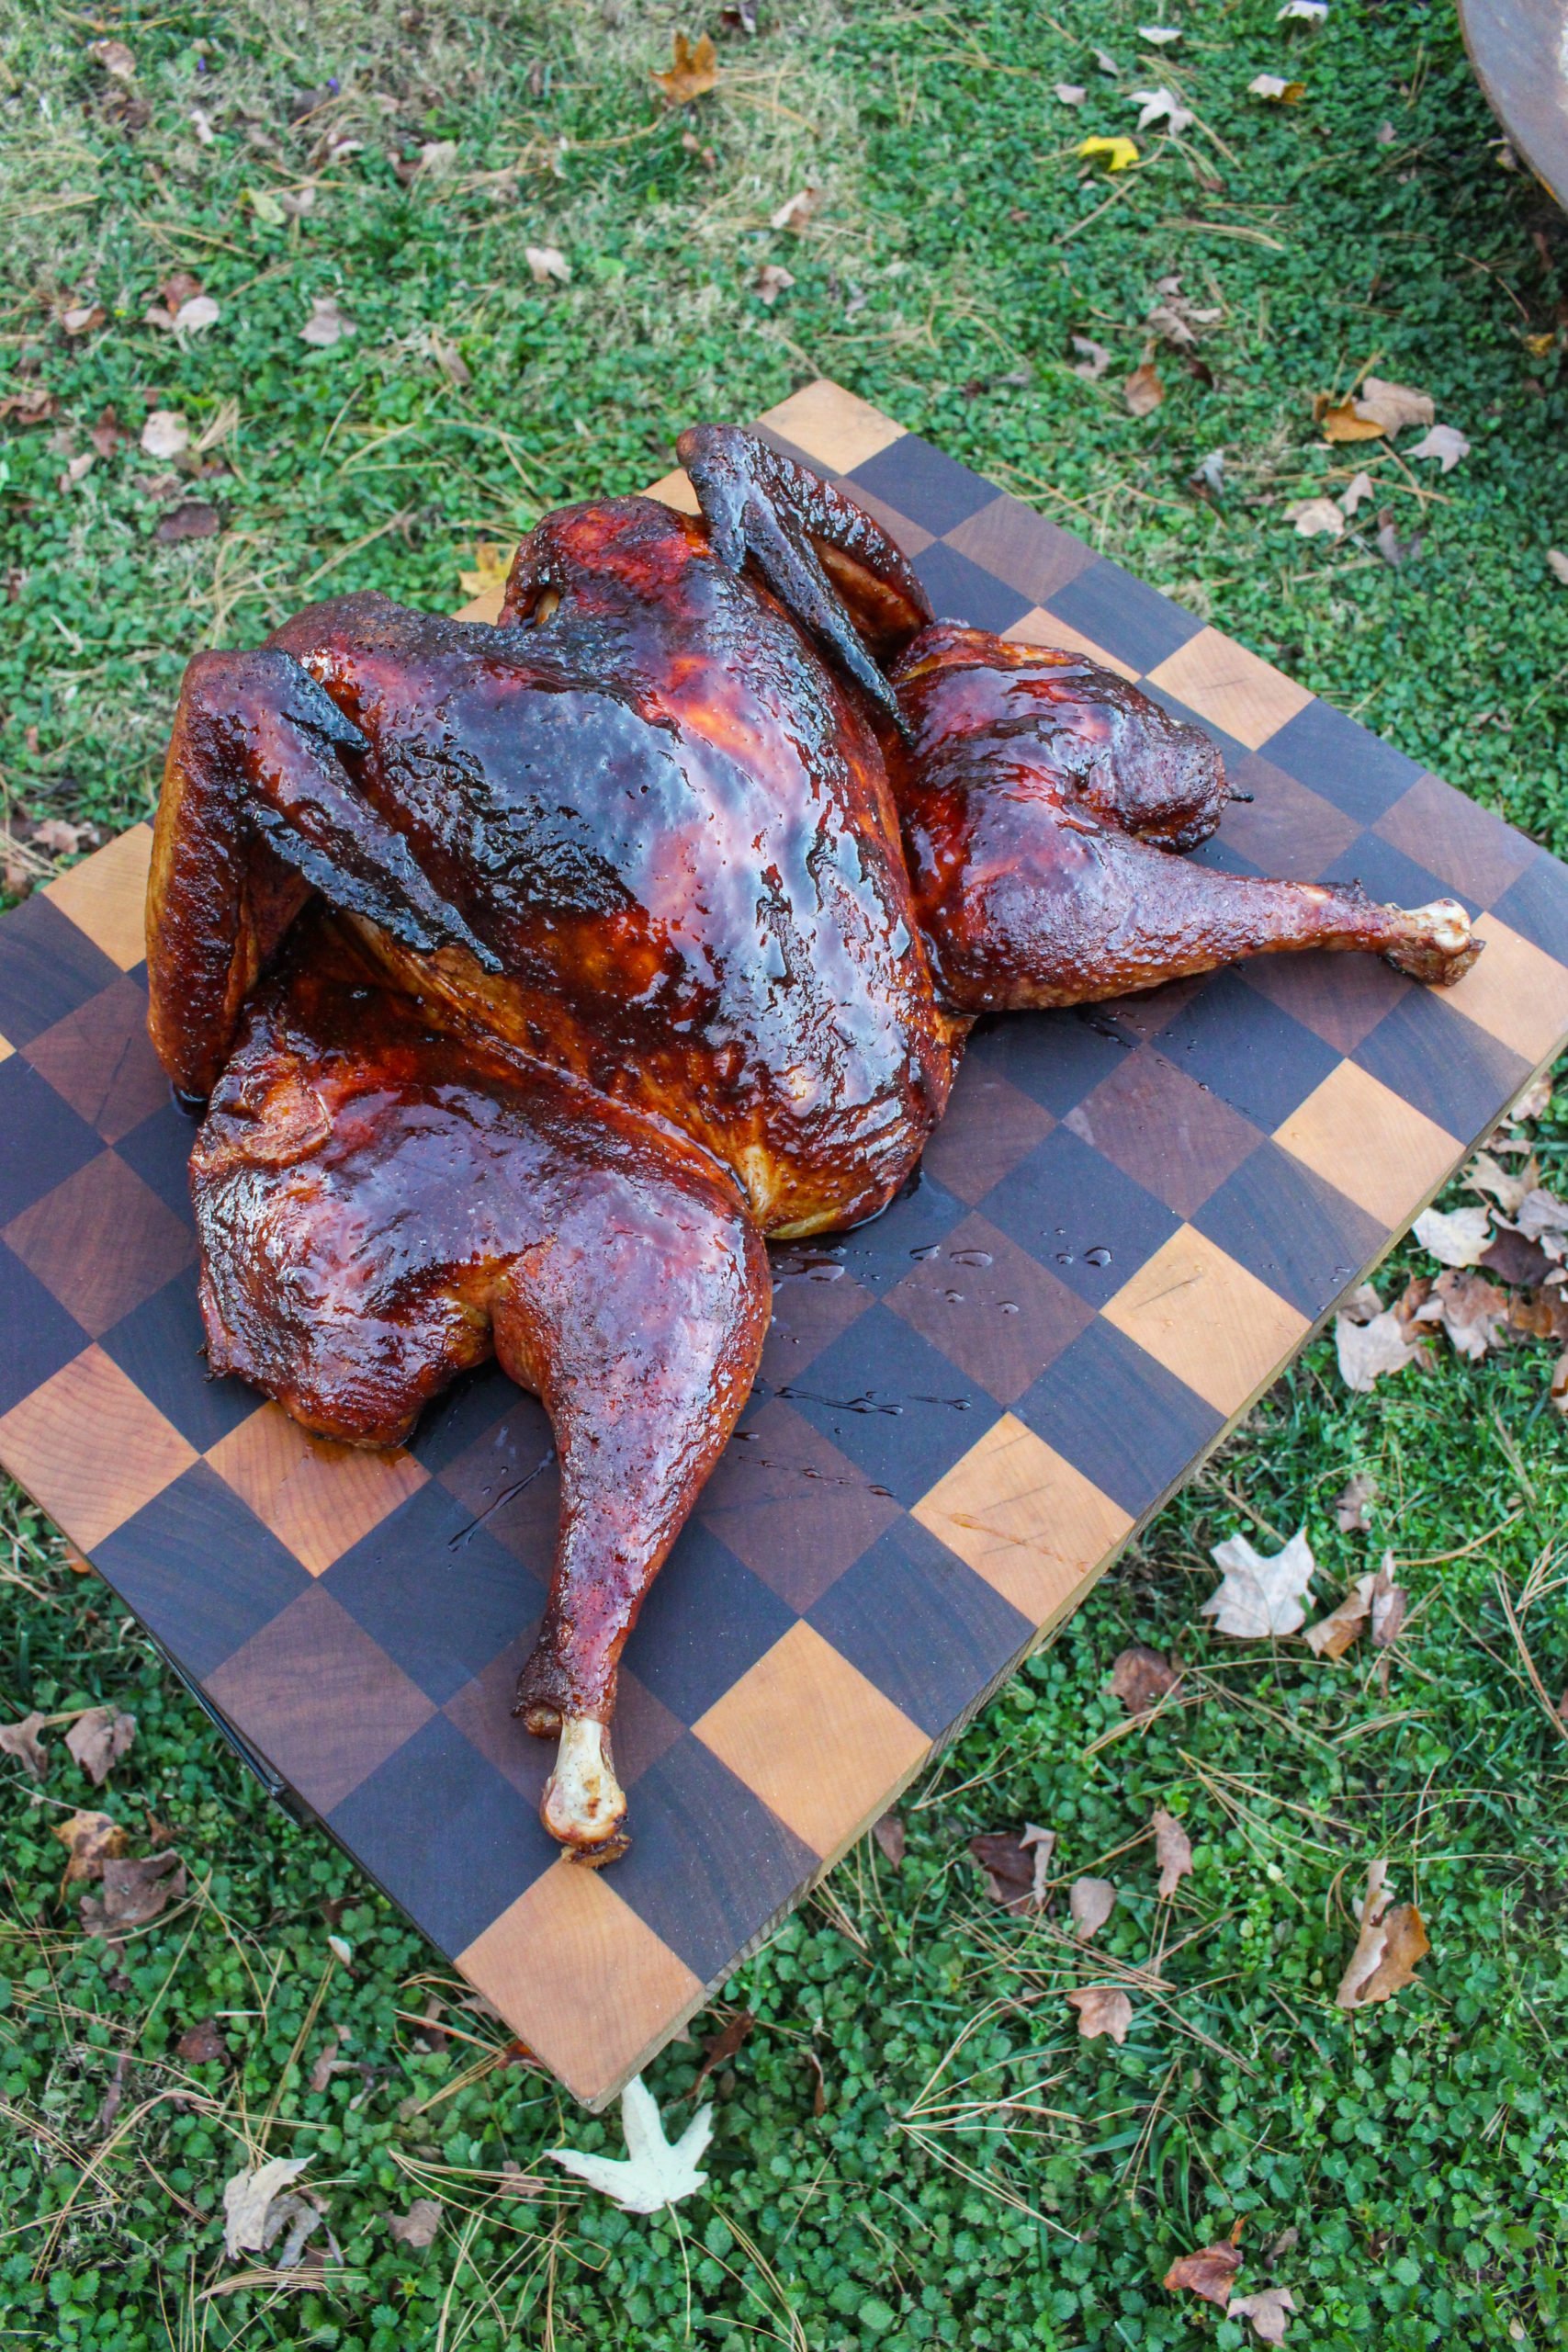
Next, we add our seasoning. I know I already talked about my awesome, limited edition Maple Bourbon seasoning, so I’ll spare repeating myself, but just know it’s awesome. I covered the entire turkey with this stuff and have zero regrets. The sweet maple flavoring paired with caramel notes of bourbon was perfect for this turkey. Also, don’t forget the sweet orange and cinnamon glaze we’re going to baste the turkey with! They’re a match made for each other!
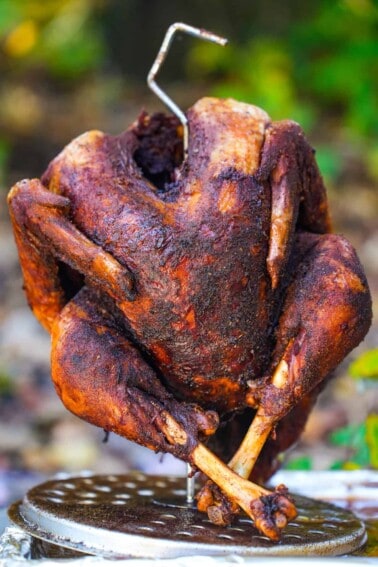
Place the spatchcocked turkey on the grill after it’s been seasoned. Close the lid to the smoker and let it cook for 3.5-4.5 hours until it reaches an internal temperature of 165F in the thickest part of the thigh and breast.
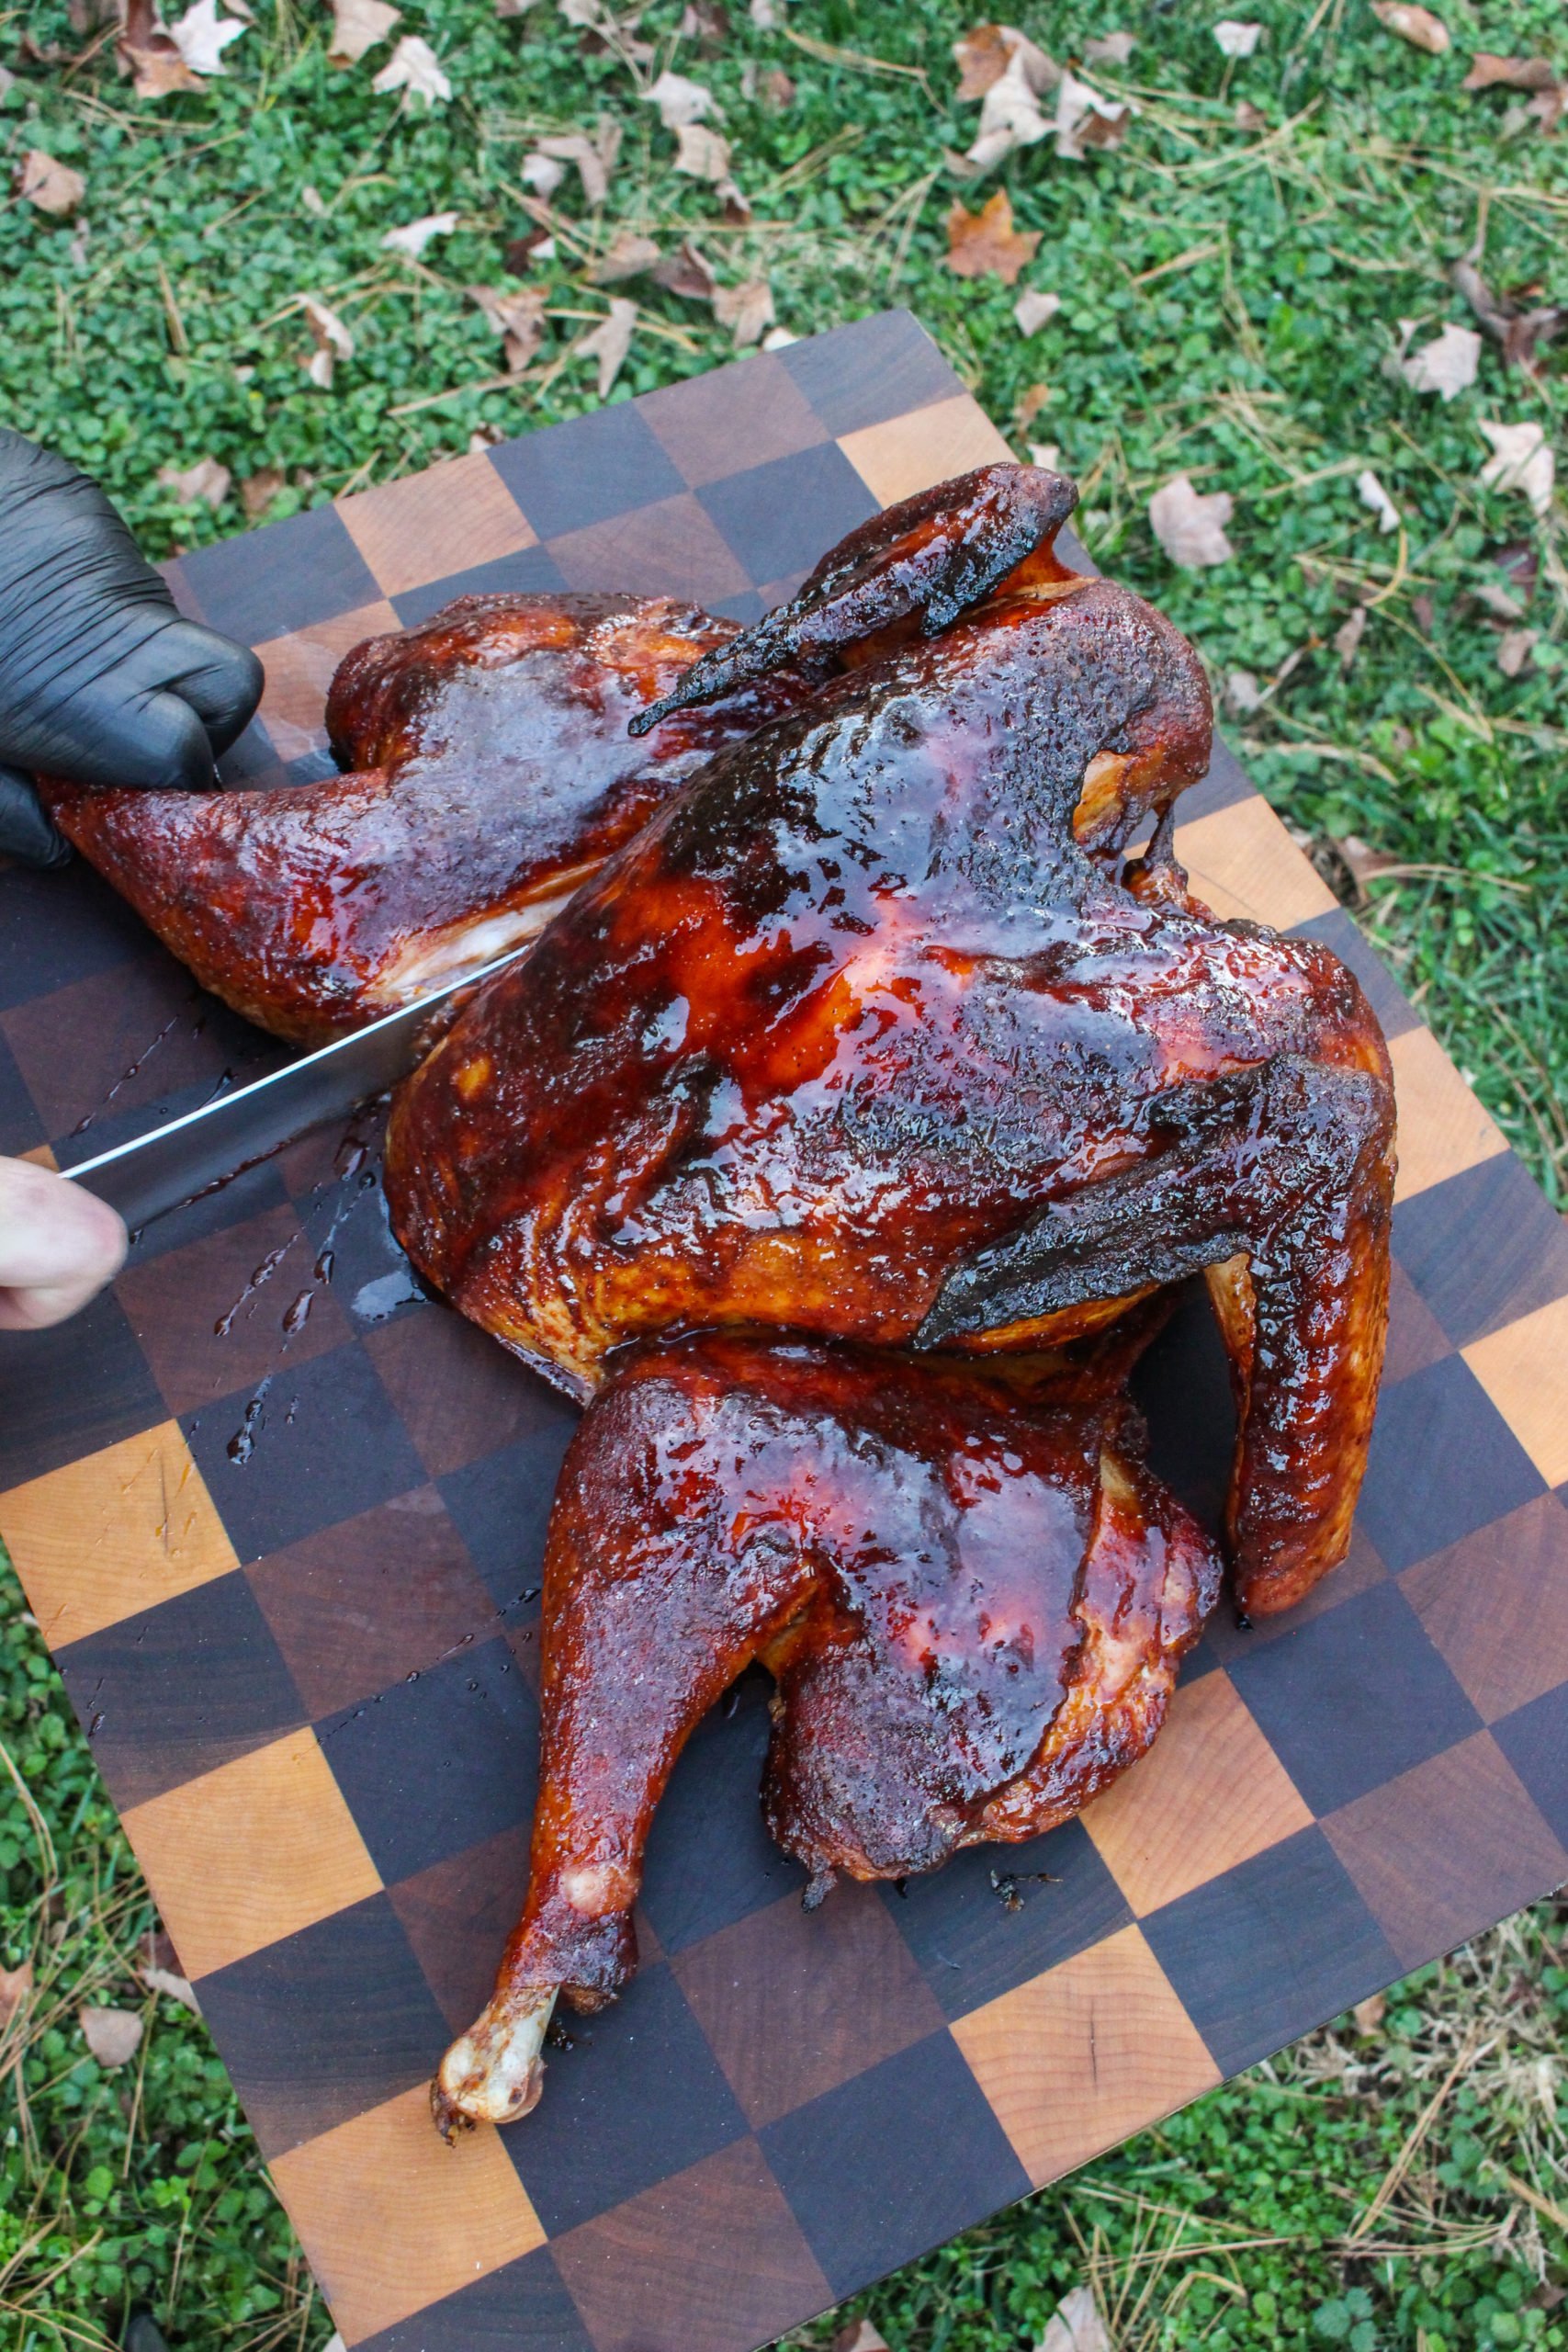
While that’s cooking, go to the charcoal chamber and mix the bourbon glaze together. When the turkey is about 15 minutes out from being cooked, brush it entirely with this glaze. This glaze will produce a nice crispy skin on the outside of the turkey!
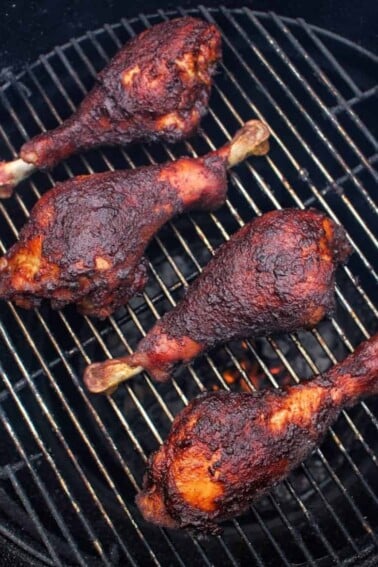
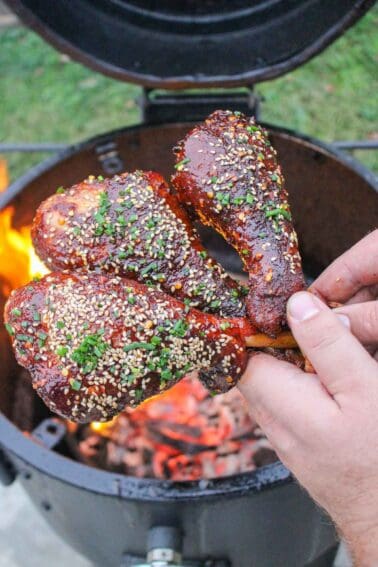
More on my Maple Bourbon seasoning with Spicy Maple Bourbon Candied Bacon and Maple Bourbon Smoked Salmon.
After the turkey has hit temp, pull it from the grill and let the turkey rest for around 30 minutes. Then transition it to a cutting board or serving platter and serve it up! The result is a beautiful orange and golden brown turkey that’s also extremely juicy and tender. As always, it is best enjoyed with friends and family. Cheers!
Spatchcock Turkey Tips
- Use a meat thermometer to ensure the internal temperature of the turkey reads at least 165F.
- Use sharp kitchen shears or a sharp knife to cut the sides of the backbone.
- Your bird may need more or less cooking time, depending on the turkey size.
- Feel free to add other fresh herbs, like thyme or rosemary, to your brine!
More Turkey Recipes
How to Store Leftovers and Reheat
Store leftover turkey in an airtight container in the fridge for 3-4 days. You can also freeze cooked turkey for 6 months if stored within 3 days of cooking.
To reheat, you have a couple of options:
- Oven: Preheat your oven to 300-325F. Then, bring some chicken broth to a simmer. Place your turkey slices in a baking dish and place a kitchen towel over it. Then, pour the heated chicken broth over the towel until it becomes wet but not soaking. Cover with aluminum foil and place in the oven.
- Microwave: Grab your sliced turkey and a plate. Then, dampen a paper towel and place it on top of your turkey slices. Microwave in 30-second intervals until the turkey is heated.
Got extra turkey? Make these Leftover Chipotle Turkey Empanadas!
What to Serve With Spatchcock Turkey
If you’re serving this turkey on Thanksgiving Day, serve it up with some sweet potato casserole, green beans, cranberry sauce, and gravy! The maple bourbon flavors in this turkey pair beautifully with Thanksgiving dishes!
Spatchcock Turkey Recipe FAQs
Brining is very similar to marinating, except a brine’s foundation ingredients are salt and water (you can also add sugar). The purpose of a brine is to help the protein retain moisture. It does this by dissolving some muscle fibers of the meat, which results in a more tender and juicy meal.
You can also use brines to help infuse flavor by adding your desired herbs or seasonings. For this recipe, I tossed in a couple bay leaves and cinnamon sticks. This means before my turkey even hits the grill, it’s already had time to tenderize and take on flavor. How awesome is that?!
Spatchcock is a method of cooking that involves removing the spine from a turkey (or chicken) so that the protein will lay flatter on the grill/smoker. For this turkey, I flip the turkey breast side down, cut out the backbone of the bird, flip it back over, and position its legs to lay flat. This will help our turkey cook evenly.
Absolutely! A dry brine means you’re not submerging your turkey in water. Instead, you can leave the water out and use my maple bourbon seasoning all over the bird and slide the butter slices underneath. Then, pop the bird in the fridge to brine for 8-18 hours for maximum flavor.
Technically, yes, but the term ‘butterfly’ is more used with individual pieces of meat that you slice open and flatten. Spatchcocking refers to cutting the whole bird open and flattening it.
Traditional roasted turkey is where you cook the entire turkey without cutting the backbone out as you would with spatchcocked turkey. Although roast turkey is how most holiday turkey is cooked, spatchcocked turkey is even more effective at cooking the entire turkey evenly and in a fraction of the time.
Get The Cookbooks!
Flavor X Fire & FOOD X Fire
All the major tastes—salty, sour, sweet, bitter, and umami—are explored in depth, along with an investigation of other components you should consider when it comes to flavor, such as aroma, heat, and texture.
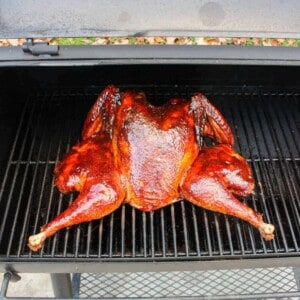
Maple Bourbon Spatchcock Turkey
Ingredients
Turkey:
- 1 Whole Turkey (14-16 lbs) fully thawed
- ½ cup Maple Bourbon Seasoning
- 2 Unsalted Butter sticks cut into pieces
Brine:
- 2 Gallons Water
- 1 cup Salt
- 1 cup Sugar
- 2-3 Bay Leaves
- 2-3 Cinnamon Sticks
Maple Bourbon Glaze:
- 4 oz Bourbon
- 1 Navel Orange juiced
- 2.5 tbsp Maple Syrup
- 1 tsp Cinnamon
Instructions
- Before starting, make sure your turkey is fully thawed.
- Once thawed, add water, sugar and salt to a food safe bucket. Mix it thoroughly until the sugar and salt are fully dissolved.
- Once done, add the bay leaves and the cinnamon sticks to the brine along with the whole turkey.
- Making sure the turkey is fully submerged, cover the bucket and place in the fridge for at least 4 hours but ideally overnight.
- Next day, pull the turkey out of the brine and pat dry of any excess moisture. Discard the leftover brine.
- Start spatchcocking the turkey by using a sharp knife of kitchen shears. Remove the backbone of the bird carefully, then trim the skin and use these for stock later.
- Lay the spatchcock turkey flat and press firmly on the breast until the breast bone breaks and lays fully flat.
- Next, carefully separate the skin and breast and place 3-4 tabs of butter on each side. Do the same in the turkey thighs.
- Once the butter is placed, begin to season with my Maple Bourbon Seasoning or your favorite BBQ Seasoning. Seasoning thoroughly and then put in the fridge for 30 minutes to set.
- Preheat your smoker to 275F for indirect cooking. Add wood chips or wood chunks for added smoke flavor if you desire.
- Add the turkey to the smoker and cook for about 3.5-4.5 hours until the breast and thighs read 165F internal.
- About 30 minutes before the turkey is done, begin making the glaze.
- Heat a medium high heat fire (around 375F) with a cast iron skillet.
- Carefully add bourbon to the skillet and let simmer for 2 minutes until reduced by half.
- Next, add the rest of the glaze ingredients and let simmer for 5-6 minutes until they have thickened.
- When the glaze is ready, begin to glaze the outside of the turkey and let it continue cooking until it is done.
- Once the turkey is done, pull it off and let it rest for at least 30 minutes. Slice, serve and enjoy!


What do you do with the sliced orange???
Does the cook time vary for different sized birds?
I’m trying this for thanksgiving so I’d like to make sure!
Yes it does depend on size. This was a 14-16lb turkey if I remember correctly.
What would you recommend for time increase per pound above 16lbs. I’m at just under 20 lbs
I would add at least 1-1.5 more hours!
Can it be done on an oven?
Of course!
Just finished a 14 lb. turkey. Temperature was between 350-375 it was done in an hour & a half. Had it on a ceramic disc so the bottom would not burn. The Bourbon sauce was put on as per directions but by that time the skin was too hard so the sauce just ran down the bird on to the ceramic disc…made a nice flame. I took the remaining sauce & poured it on the turkey just before I took it off the disc…grreat show. My kids & grandkids lived it…beautiful flame.
Godspeed & have a grreat Thanksgiving…
Do you prefer the reverse flow smoker over the regular flow?
I prefer the regular but the reverse is excellent too!
This was the best Turkey I have had in a very long time. Perfection. Thank you for the inspiration and the recipe. I recommend the maple bourbon spice as well.