This Peter Luger Style Steak is based on the steak from a famous steakhouse located in New York City: Peter Luger’s Steakhouse. Juicy steak is brined, coated in a flavorful garlic butter, and cooked until tender and juicy.

My goal? To see if I can replicate it right at home, because it’s not every day I can book a trip to New York!
And I think I did pretty darn well.
Brine the Steak
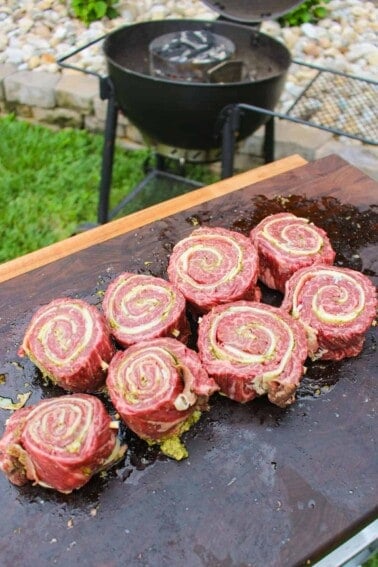
First, a great steak needs a brine. So, season the steak generously with coarse sea salt. Now, you can use whatever cut of steak your heart desires. This is your Peter Luger Style Steak after all!
Set the salted steak into the fridge and allow it to dry brine ideally overnight, but for a minimum of 40 minutes if you’re lower on time.
Love a great steak recipe? You’ll also love my Parmesan Crusted Steak Skewers, Blue Cheese Crusted Steaks, or Cajun Rubbed Steak with Bourbon Street Sauce!
Garlic Butter for Your Peter Luger Style Steak
Next, our garlic butter. This couldn’t be simpler! In a bowl, mix together melted butter, garlic paste, Worcestershire sauce, and kosher salt.
And that’s it for your butter!
Looking for more garlic butter recipes? Try my Grilled Garlic Butter Picanha, Reverse Seared Ribeyes with Black Garlic Butter, or Garlic Butter Steak and Shrimp!
Let’s Cook a Peter Luger Style Steak
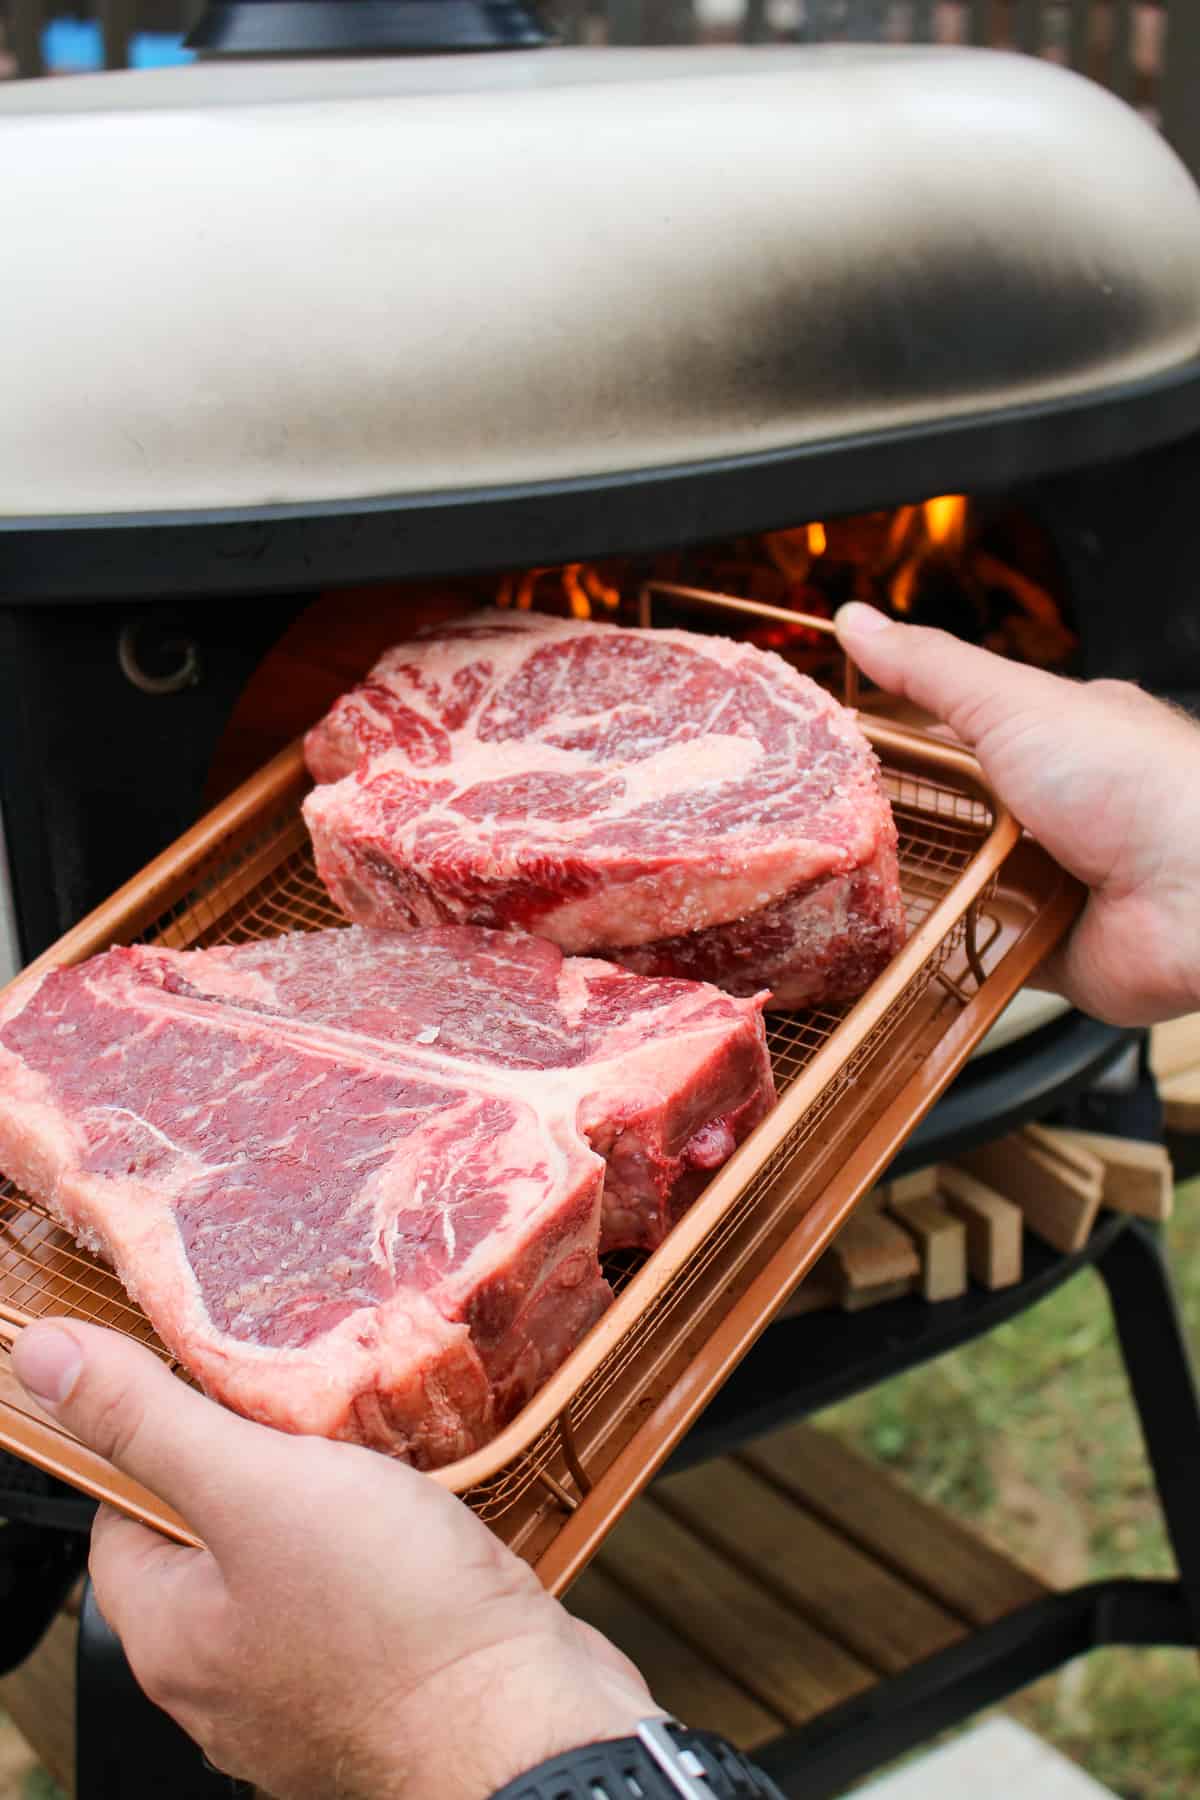
So, with the steak and butter ready to go, it’s time to cook! First, preheat your pizza oven for direct cooking at a high temperature of 850ºF. If you don’t have access to a pizza oven, a broiler or salamander grill work great as well! Anything with high heat will give your Peter Luger Style Steak that killer crust.
First, pull the brined steaks out of the fridge and let them come to room temperature for roughly 15 minutes. A room temperature steak cooks more evenly!
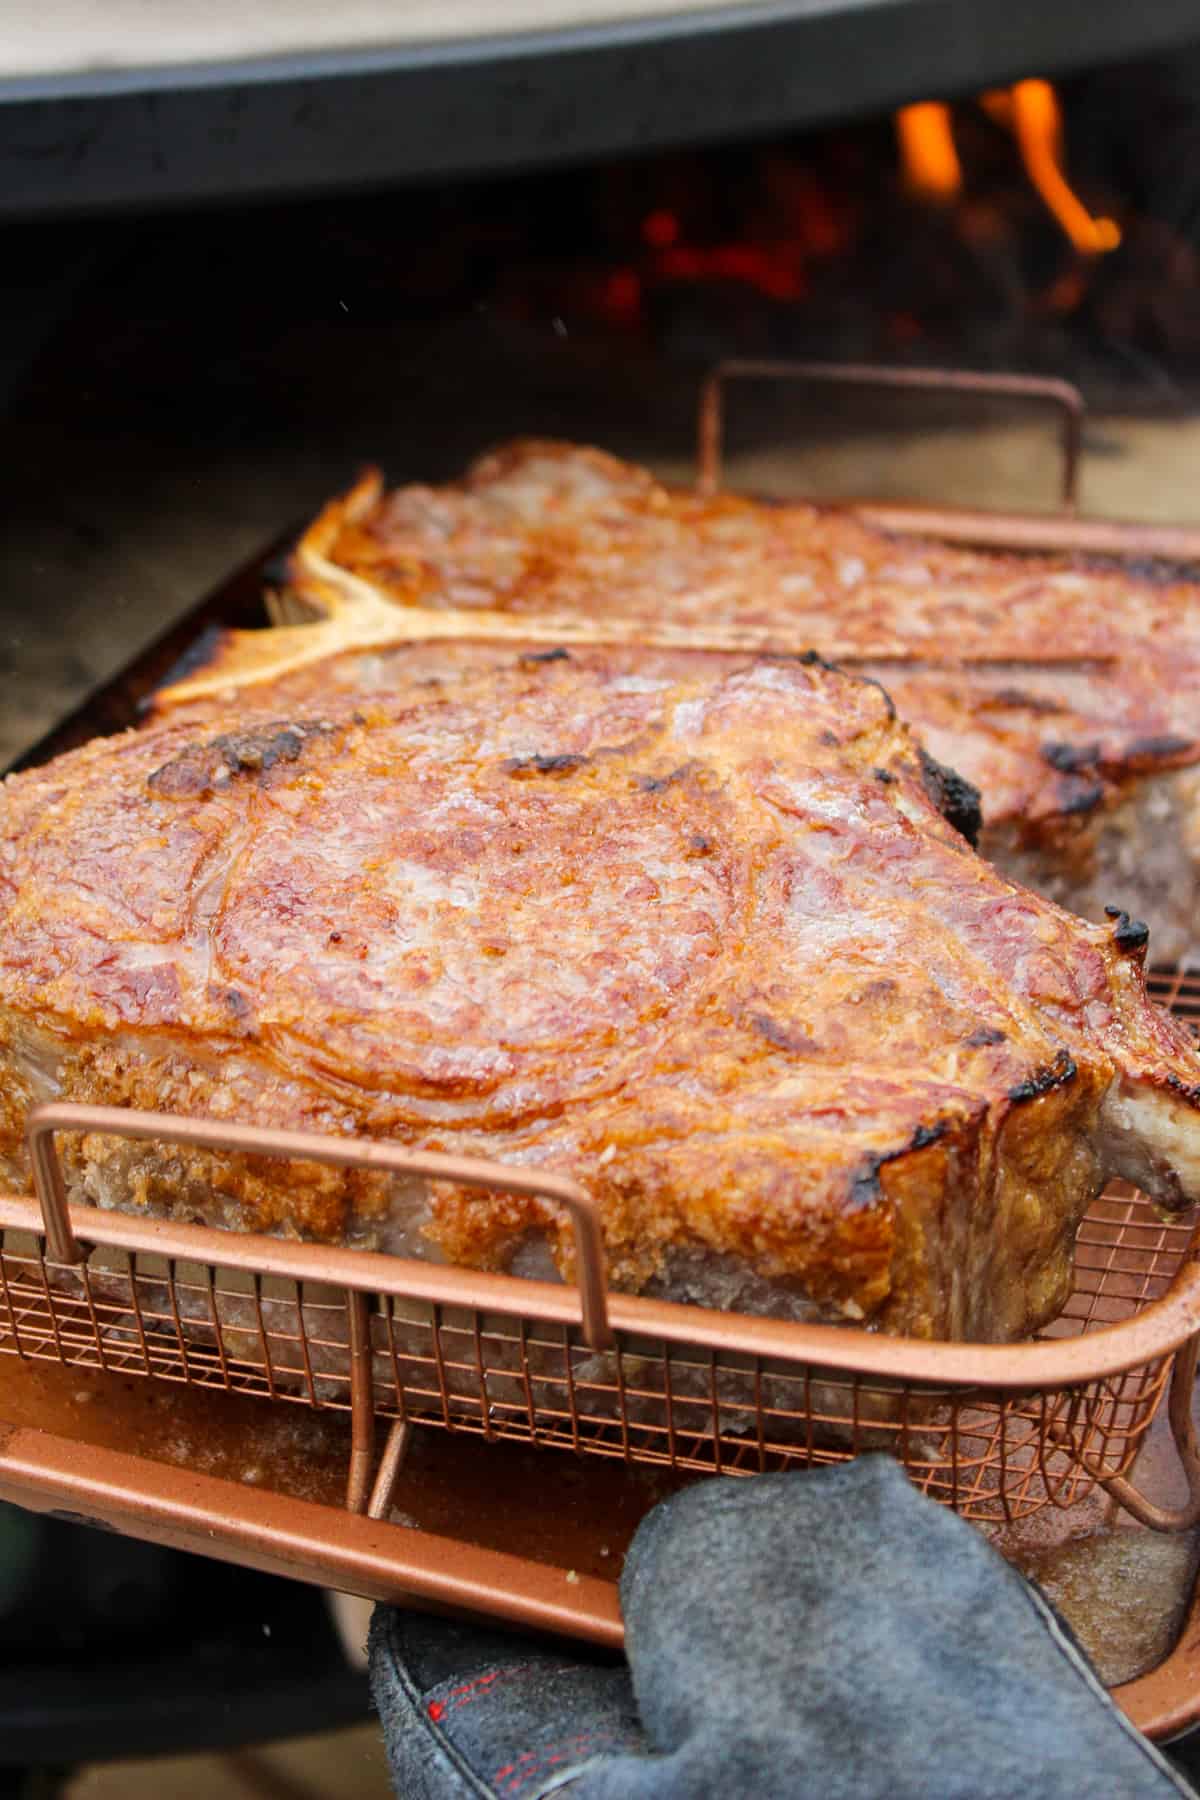
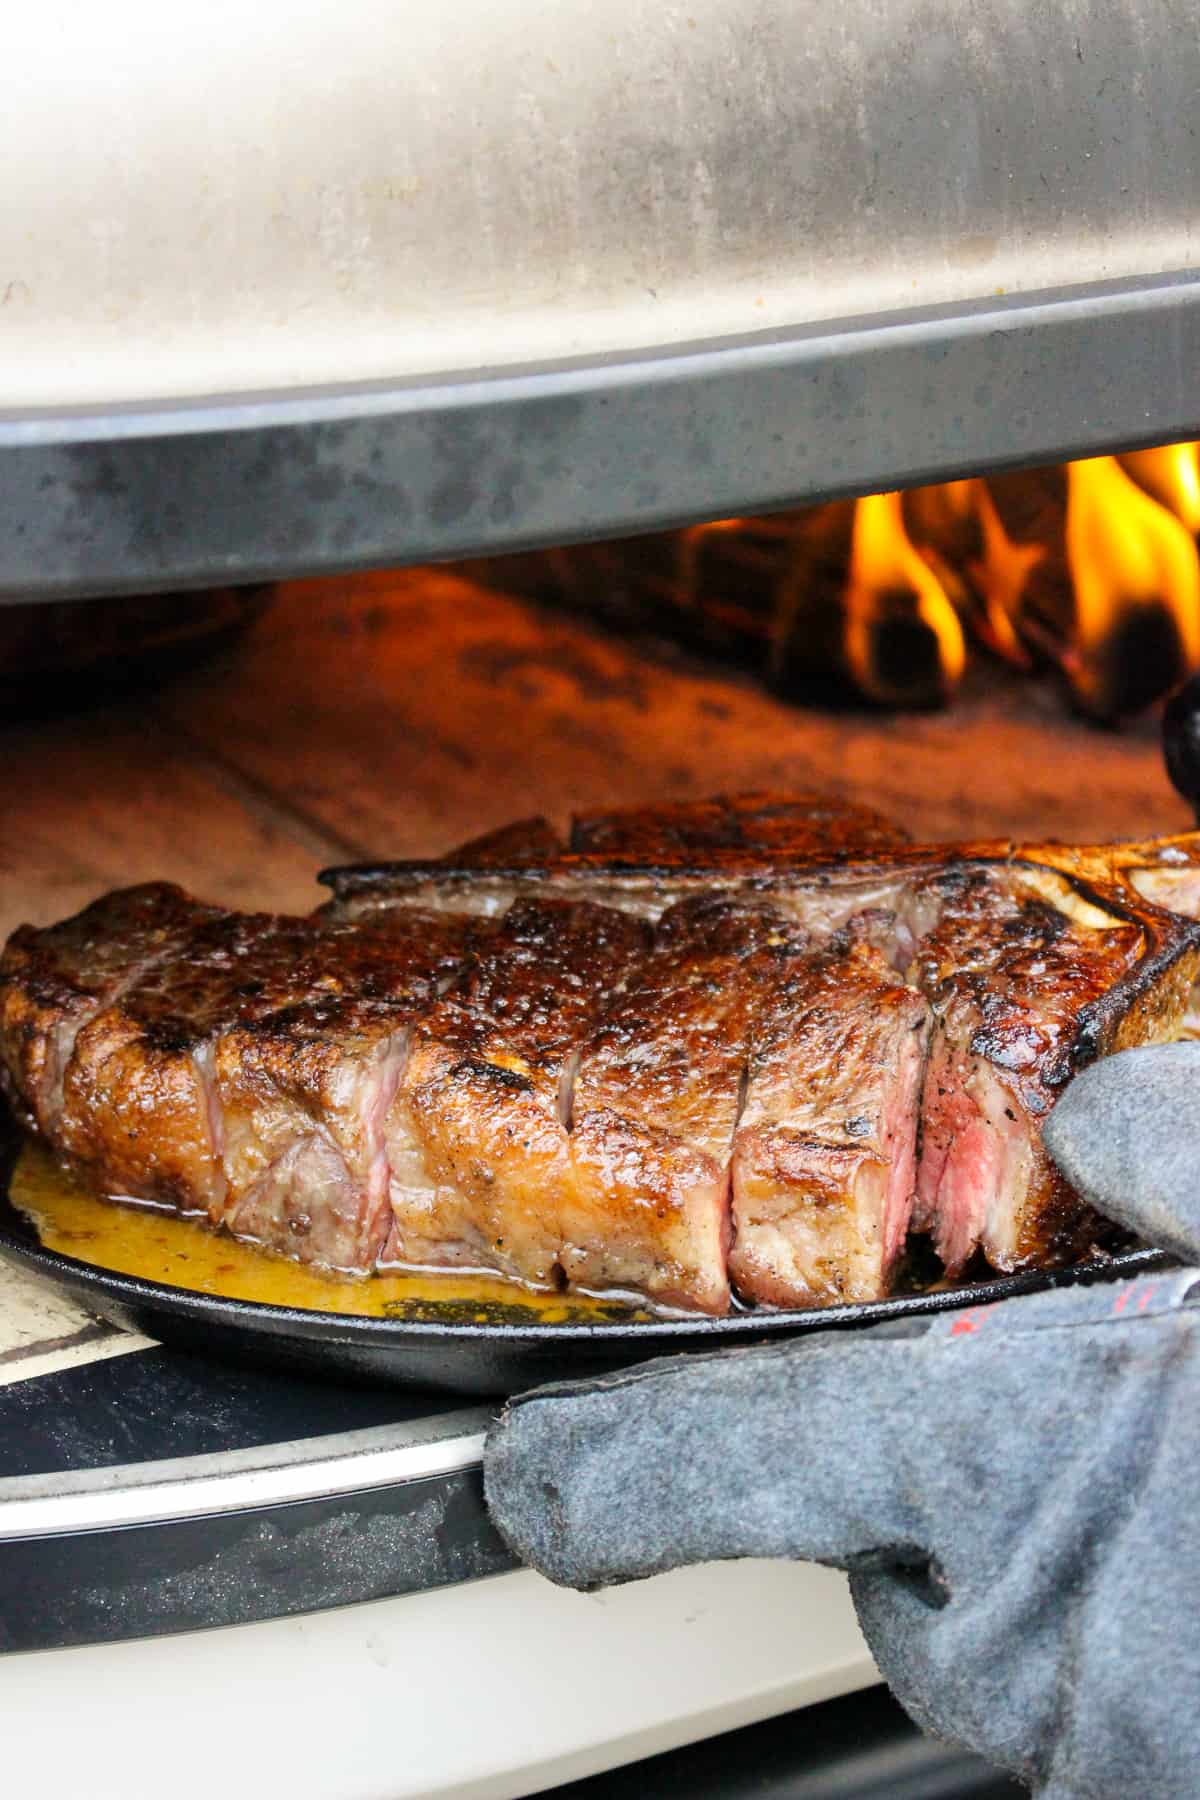
Next, add the steaks onto a wire baking sheet and slide them into the pizza oven. Allow them to cook for 2 minutes, rotating the steaks after 1 minute for even cooking. After 2 minutes, flip the steaks over and cook for another 2 minutes so that a nice crust forms all over.
Slice and Continue Cooking
Okay, now that we have the crust nice and crispy, we’ll slice and finish cooking our Peter Luger Style Steak.
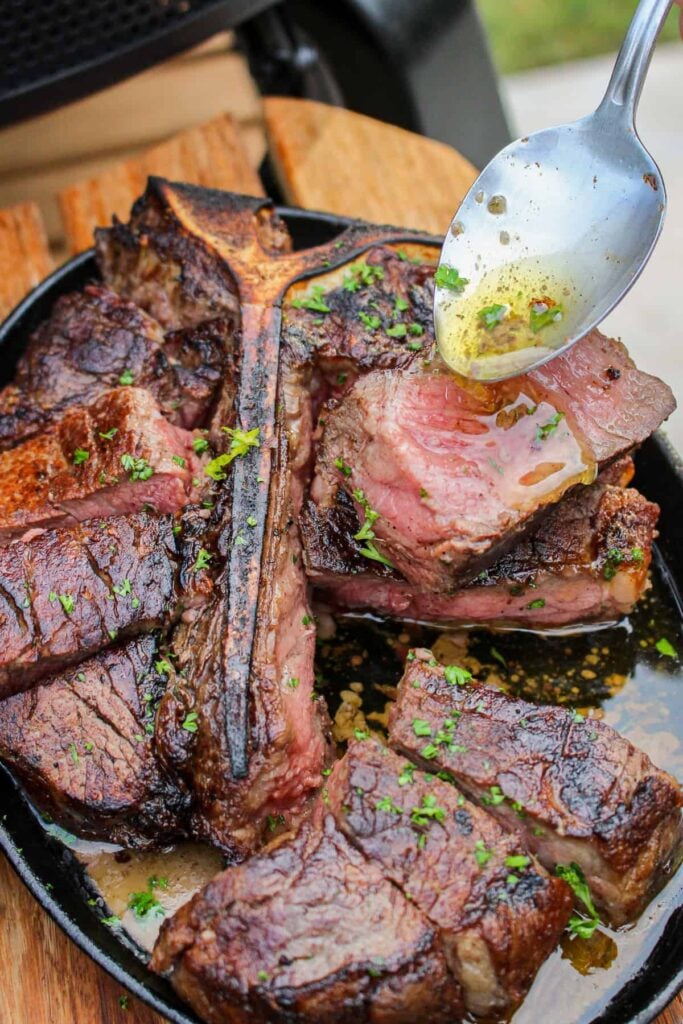
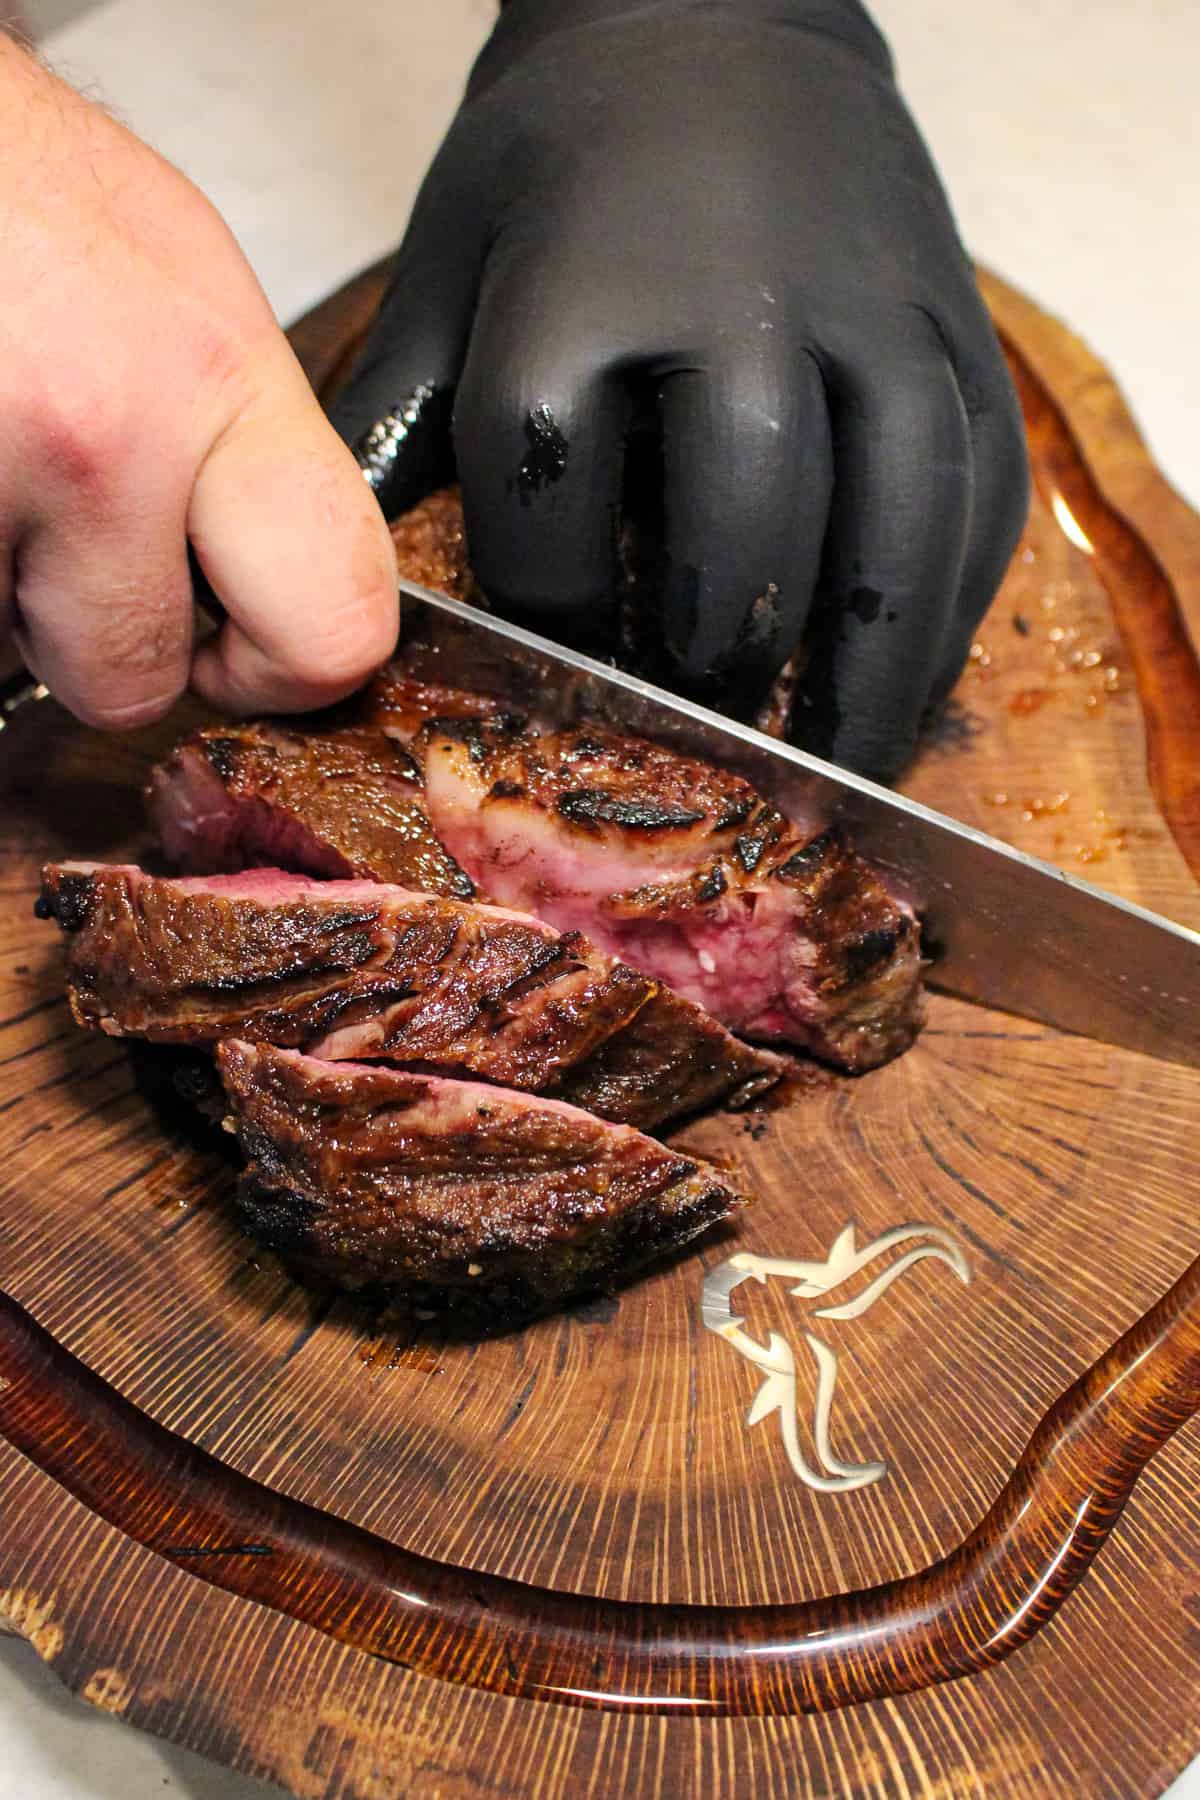
First, pull the steaks out of the pizza oven and slice them up into finger sized cuts.
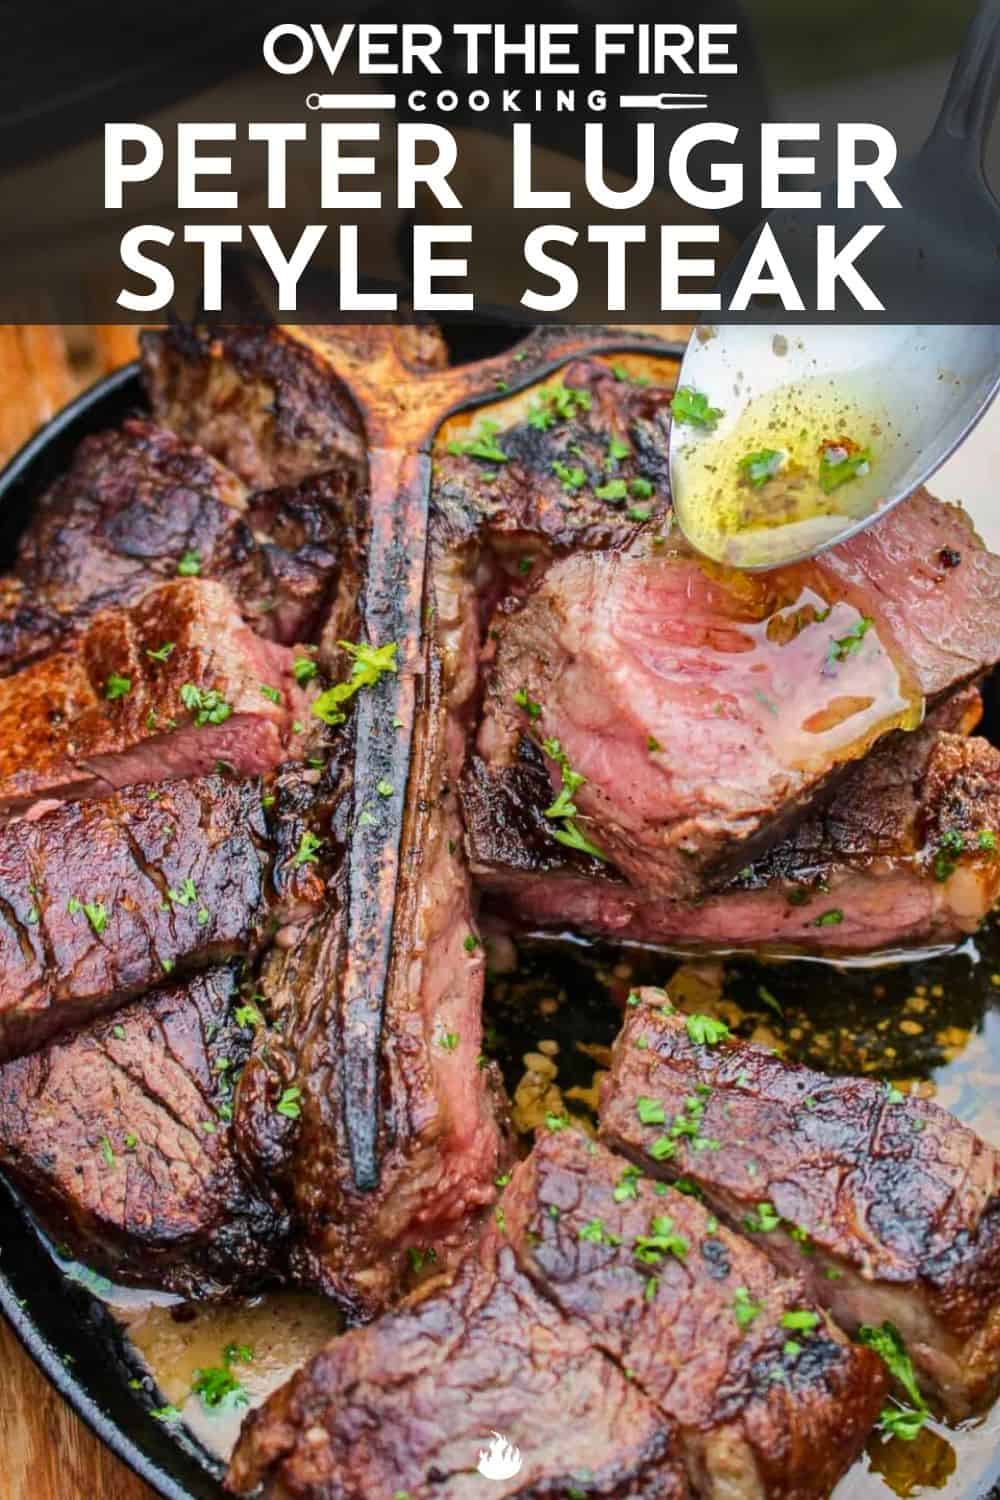
Place the slices into a cast-iron skillet, a high heat ceramic serving dish, or a fajita skillet. Make sure that the slices of steak are close enough together that no red is showing.
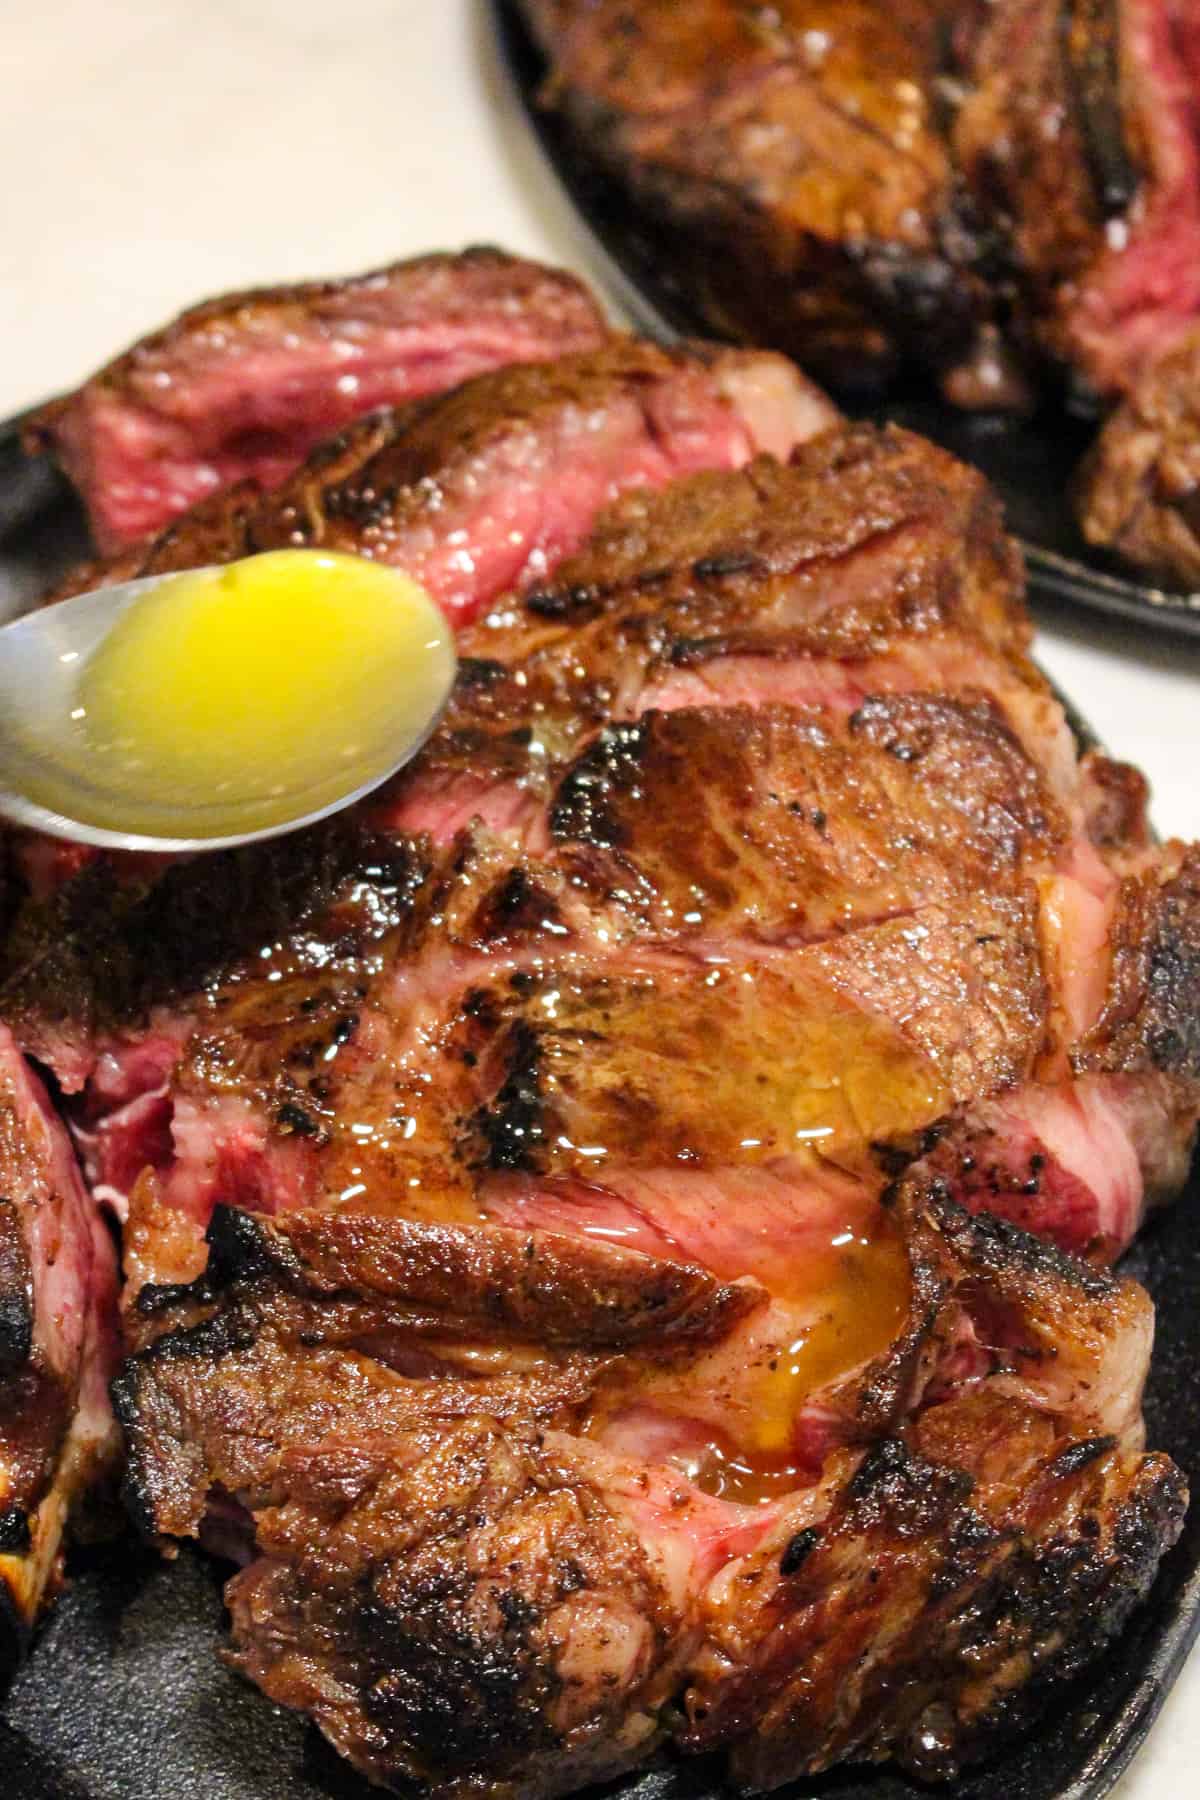
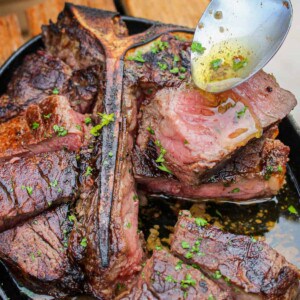
Next, grab your bowl of prepared butter and drizzle over the Peter Luger Style Steak. Make sure you cover the whole steak because we want that flavor in every, single bite.
Lastly, place the skillet with the steak back into the pizza oven and cook to your liking. Remember, the oven is at a very high heat, so the Peter Luger Style Steak will cook quickly.
Time Table for Your Perfect Peter Luger Style Steak
So, that final cooking time can vary depending on how well-done you like your steak. But, here’s a rough estimate guide to follow!
- Rare = 45 seconds to 1.5 minutes
- Medium Rare = 1.5-2 minutes
- Medium = 2-2.5 minutes
- Medium Well = 2.5-3 minutes
- Well Done = 3+ minutes
As I said, this is a rough estimate, but does give an idea of what you should aim for!
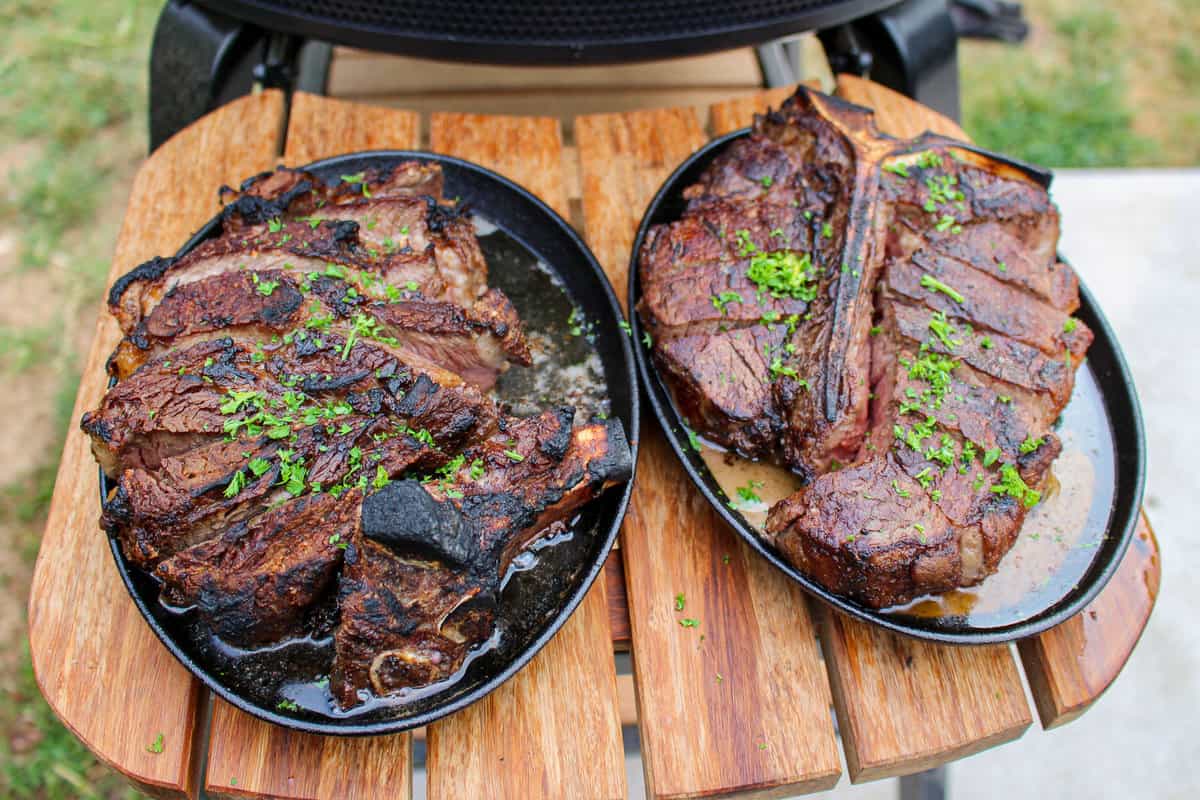
Finally, to serve your Peter Luger Style Steak, pull it out of the pizza oven and let it rest for 5 minutes.
Lastly, garnish with chopped parsley and dig in!
Loving this steak? Check out my grilled steak oscar style for another mouthwatering recipe.

Get stoked for life
This sauce is FYR!
Born from a deep passion for food and flavor. Whether you’re grilling in the backyard or live fire cooking around the world, we have what you need to transform every meal into an adventure.
Peter Luger Style Steak
Ingredients
Steak:
- Steak of Your Choosing at least 1.5” thick
- Coarse Sea Salt as needed
- Chopped Parsley for garnish
Butter:
- 3 tbsp Clarified Butter melted
- 1 tbsp Garlic Paste
- 1.5 tsp Worcestershire Sauce
- Kosher Salt to taste
Instructions
- Begin by generously seasoning your steak with coarse sea salt and placing in the fridge to dry brine overnight. If you do not have that much time, season and place in the fridge for up to 40 minutes.
- Next, in a bowl mix together all the ingredients for the butter and set aside until ready to use.
- Preheat your pizza oven to 850F for direct cooking. You can easily do this in a broiler or salamander grill as well.
- Pull your steaks out and bring to room temperature (about 15 minutes). Add them to a wire baking sheet and place in the pizza oven to cook for 2 minutes making sure to rotate the steaks halfway through. Then, flip the steaks over and cook for another 2 minutes until they are sizzling and have developed a nice crust.
- Next, pull the steaks out and slice them up into finger size cuts. Place them on a cast iron skillet, high heat ceramic serving dish or a fajita skillet. Push the sliced steak close together so that no part of the inside of the steak is showing (no red). Drizzle the butter mixture over the top of the steak making sure to get it all over.
- Finally, place your steaks back into the pizza oven at high heat and cook to your desired temperature. This is not a perfect science, but I have noticed the following times below after putting the steak seem to yield good results (see below).
- Once done, pull out and let rest for 5 minutes. Garnish with chopped parsley and enjoy!
Temperature Times
- Rare = 45 seconds to 1.5 minutes
- Medium Rare = 1.5-2 minutes
- Medium = 2-2.5 minutes
- Medium Well = 2.5-3 minutes
- Well Done = 3+ minutes


Looking for over the fire grill cook book with Peter Luger style steak, gift for my son
What pizza oven are you using for this? Thanks
This is from Gozney!
If i was trying this on a grill would you recommend straight to the cast iron or still use the wire wrack? Thanks!
I would say skip the rack and just grill the steaks really high heat for 30-45 seconds a side then slice and bake.
Any alternative to wire rack? I can’t find one that is suitable for these temperatures?
Or do I just introduce it at the end?
There is one from Made In! You can also just use a cast iron skillet and flip about half way through!
What kind of gloves are those? Did you let the steak rest before slicing and putting back into the pizza oven? Looks awesome!
The gloves are welding gloves off amazon. And yes I let it rest before adding it to the oven again.
Awesome post!!! ? Where can I find that wire rack and sheet from. I can’t find a high temp wire rack for 850 degrees. Thanks in advance.
I actually recommend using the roasting rack from Made In. That can withstand 1200F!
Can I get the exact wire rack you use and those grill plates you used? I have a homemade pizza oven so the made in roasting tray is too big.
Awesome recipe!
I recommend this one: https://madeincookware.com/products/blue-carbon-steel-roasting-pan/with-rack
Outstanding. We ordered our porterhouse from Master Purveyors and followed the recipe exactly in our Oonie. Turned out perfectly! Served with crispy smashed potatoes and now friends request this dish all the time.
Don pep’s style veal parmigiana
Way to go Derek! Thank you so much for this recipe!
What brand of pizza oven did you use for cooking the Peter Luger Style Steak?
From Gozney!
I don’t have access to a high-temp oven. I can sear on my grill, but could the baking work at 550 for a bit longer?
Sure thing! It will just take longer. Id recommend searing over the fire for that crust first longer then baking.
Mmm